Placeholder Content Image

Plant-based Goan curry

<p>Warm up your dinner table with this gluten-free, dairy-free curry.</p> <p><strong>Ingredients:</strong></p> <p> Spice blend</p> <ul> <li>1 1/2 tablespoons ground coriander</li> <li>2 teaspoons ground cumin</li> <li>3/4 teaspoon ground turmeric</li> <li>1 1/2 teaspoons fresh grated ginger</li> <li>5 cloves garlic, peeled and crushed</li> <li>1 1/2 tablespoons coconut sugar</li> <li>1 1/2 tablespoons apple cider vinegar</li> </ul> <p>Curry</p> <ul> <li>3 tablespoons coconut oil</li> <li>2 (300g) brown onions, peeled and cut into quarters, leaving the base of the onion intact</li> <li>250g cherry tomatoes, some halved, some left whole</li> <li>600ml coconut milk</li> <li>2 green chillies, slit lengthways in quarters, seeds removed</li> <li>400g firm organic tofu, cut into 2cm pieces</li> <li>1 1/2 teaspoons mustard seeds</li> <li>1 cup coconut flakes</li> <li>To serve: fresh coriander or toasted curry leaves, basmati rice, extra steamed vegetables</li> </ul> <p><strong>Method:</strong></p> <ol> <li>To make the spice blend: Combine all ingredients in a bowl and mix to combine.</li> <li>To make the curry: Place a sauce pan on low to medium heat, add coconut oil and spice blend and cook, stirring frequently for about 90 seconds.</li> </ol> <ol start="3"> <li>Add the coconut fat from the top of the coconut milk can (this is the solidified part of the coconut milk, under which you’ll find more watery substance) with the onion and cook with the lid on for about 5-6 minutes, stirring every now and then. Add the remains of the coconut milk (the more watery part), chilli and mustard seeds, cover and bring to the boil for about 5 minutes.</li> </ol> <ol start="4"> <li>Add tofu, tomatoes and 1/4 cup water, cover and bring to the boil, then remove lid and reduce heat to simmer for 20 minutes. Just prior to serving, gently stir through the coconut flakes, garnish with your choice of coriander or curry leaves (make sure you give these a quick dry fry in a pan if you choose to use them), season with sea salt and black pepper and serve with basmati rice and extra steamed vegetables.</li> </ol> <p><em>Recipe by Jacqueline Alwill</em></p>

Lifestyle

Placeholder Content Image

5 of the best air-cleaning plants according to NASA

<p>The best plants are the ones that do double duty – and all of these purify your air of toxic chemicals. Even better, they’re easy to grow. According to the Environmental Protection Agency, our homes can have three to five times more pollutants than the outdoors. You could be living in a “sick” house and not realize it: Substances like xylene (in paint and lacquers), benzene (furniture wax, insect sprays) trichloroethylene (cleaners, adhesives), and formaldehyde (upholstery, air fresheners) – can produce symptoms like headaches, sore throats, or allergy-like breathing troubles. The NASA Clean Air Study was designed to find effective and simple ways to detox the air in the space station – and it reveals that common house plants have air purifying superpowers.</p> <p><strong>1. Boston Fern</strong></p> <p><span>Boston ferns are native to tropical forests and swamp areas so they will thrive in low light and high humidity – they’re ideal for your bathroom. The moisture from your shower will hydrate the plant, requiring little extra care from you. Besides being a pretty and decorative addition to your bathroom, the Boston fern helps remove xylene and – the NASA study revealed – it was the top house plant for removing formaldehyde.</span></p> <p><strong>2. Spider plant</strong></p> <p>Talk about a plant that keeps giving. It removes impurities from the air like formaldehyde and carbon monoxide. NASA’s study found that spider plants removed 95 per cent of formaldehyde from a sealed plexiglass chamber in 24 hours. Even better, the main plant sends out shoots, called “spiderettes” that flower and eventually grow into baby spider plants that you can transplant. That also helps: Research indicates that people are more relaxed and happy after caring for plants – say, for example, when they’re re-potting them.</p> <p><strong>3. Bamboo plant</strong></p> <p>This plant boasts elegance and height in addition to removing harmful elements like benzene and formaldehyde. Bamboo palms also help keep indoor air moist, making it a welcome addition in dry winter months. This palm takes a bit more care: It loves bright, but not direct sunlight and needs monthly fertilising and regular misting; when it outgrows its container (every two to three years), you’ll need to re-pot it.</p> <p><strong>4. Devil’s ivy</strong></p> <p>Devil’s ivy is actually quite angelic. It’s considered one of the most effective indoor air purifiers from benzene, formaldehyde and xylene. Plus, if you’re new to growing house plants, this is a great first plant to get. It’s lush, hardy and inexpensive. Another nice feature is that it can grow up to 2.5 metres long and in a variety of directions. In a hanging basket, it will trail downwards. Place it a pot and train it to climb a totem or trellis or place in a pot on a mantle or coffee table and let it grow horizontally.</p> <p><strong>5. Gerbera</strong></p> <p>These colourful and cheerful daisies were mainly outdoor plants until florists started using them in arrangements. Grown indoors, they can produce flowers at any time of the year, in white, red, orange, pink and purple. The flowers usually last around four to six weeks, but even without the flowers, the gerbera or Barberton daisy has lush, dark green leaves that are effective at filtering out formaldehyde, benzene and trichloroethylene. They are most happy with full sun and plenty of water and well-drained soil.</p> <p><em><span>Written by Lisa Marie Conklin. Republished with permission of </span></em><span><a href="https://www.mydiscoveries.com.au/stories/top-spot-australians-retire-2019/"><em>Handyman</em></a><em>.</em></span></p>

Lifestyle

Placeholder Content Image

7 plants to grow and spice up your home cooking

<div class="field field-name-body field-type-text-with-summary field-label-hidden"> <div class="field-items"> <div class="field-item even"> <p>For lovers of spicy Asian food, a stir-fry, laksas and curries will be favourites on the menu.</p> <p>And certain herbs and spices are necessary ingredients for these cuisines.</p> 
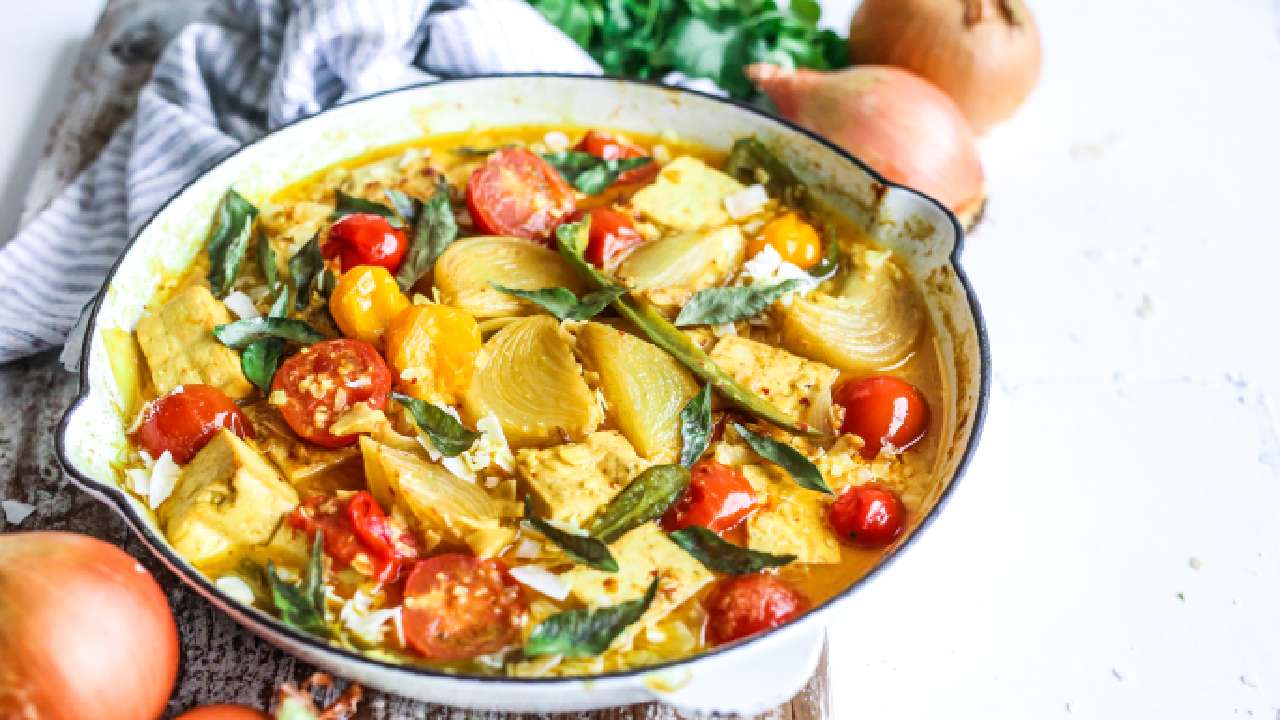
<p>Curry leaves, lemongrass, Kaffir lime leaves, chilli, galangal, ginger and turmeric are among the essentials, with different combinations imparting a fabulous zing to fish, meat and vegetable dishes.</p> 
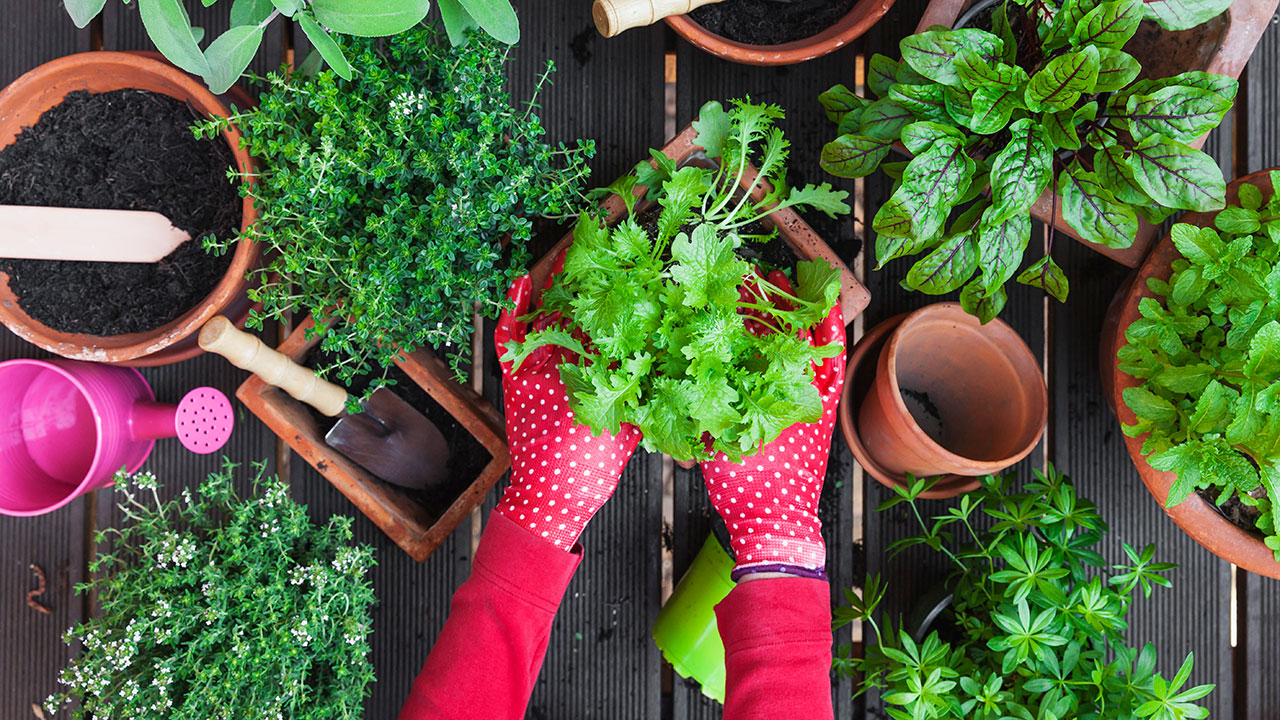
<p>Add these plants to the vegie patch so you have them on hand and can enjoy them fresh and at their best.</p> <p>Even if you have a courtyard or a balcony, you can still grow them, as most can be planted in containers.</p> <p>Many great intense flavours come from underground from rhizomes, such as galangal, ginger and turmeric, adding spice to many dishes.</p> <p>Belonging to the ginger family (Zingiberaceae), they all feature elegant tropical foliage that looks great planted among ornamentals.</p> </div> </div> </div> <div class="view view-content-slider view-id-content_slider view-display-id-content_slider_block view-dom-id-b5c8b242cf08c50b909aa17f4a0eb74b"> <div class="view-content"> <div class="views-row views-row-1 views-row-odd views-row-first"> <div class="views-field views-field-field-slides"> <div class="field-content"> <div class="field-collection-view clearfix view-mode-full field-collection-view-final"> <div class="entity entity-field-collection-item field-collection-item-field-slides clearfix"> <div class="content"> <div class="field field-name-field-slide-title field-type-text field-label-hidden"> <div class="field-items"> <div class="field field-name-field-slide-title field-type-text field-label-hidden"> <div class="field-items"> <div class="field-item even"><strong>1. Galangal</strong></div> </div> </div> <div class="field field-name-field-slide-image field-type-image field-label-hidden"> <div class="field-items"> <p>Commonly called Thai ginger, galangal (Alpinia galanga) tastes like a cross between pepper and ginger.</p> <p>A good understorey plant among other tropical foliage, it can grow up to 2m high, depending on the variety.</p> <p>GROW: Choose a semi-shaded or shaded spot in rich and moist but free-draining soil. Feed in spring and summer with Yates Dynamic Lifter and water regularly. A light frost won’t kill the plant but will damage the leaves.</p> <p>In spring, plant small rhizomes with at least two eyes 50-100mm deep.</p> <p><strong>HARVEST</strong>: Use about 10 months after planting. Dig carefully around the base and remove rhizomes as needed if you don’t want to disturb the clump.</p> <p><strong>USE</strong>: Flavour Asian soups and curries with fresh galangal. The young shoots are edible and the leaves impart a slight perfume when used to wrap steamed fish. Teams well with lemongrass.</p> <div class="field field-name-field-slide-title field-type-text field-label-hidden"> <div class="field-items"> <div class="field-item even"><strong>2. Ginger</strong></div> <div class="field-item even"> <p>The pungent rhizome of ginger (Zingiber officinale) is an important spice in Japanese and Chinese cuisine. It has elegant, lance-shaped leaves and grows to about 1.2m high.</p> <p><strong>GROW</strong>: It likes a warm, frost-free climate and a semi-shaded position in rich and moist but well-drained soil.</p> <p>Plant fresh store-bought rhizomes. Cut the rhizome so each piece has at least two eyes, let the ends dry, then plant. Feed in spring and summer with Yates Dynamic Lifter and water regularly.</p> <p><strong>HARVEST</strong>: Use about 9-10 months after planting. Dig up the whole clump or dig carefully around the clump and remove rhizomes when needed. Replant some rhizomes to ensure<br />a continuous supply.</p> <p><strong>USE</strong>: Add fresh to Asian soups, seafood and meat curries.</p> <div class="field field-name-field-slide-title field-type-text field-label-hidden"> <div class="field-items"> <div class="field-item even"><strong>3. Turmeric</strong></div> </div> </div> <div class="field field-name-field-slide-image field-type-image field-label-hidden"> <div class="field-items"> <p>The name turmeric (Curcuma domestica) is thought to originate from the Latin words terra merita, meaning ‘merit of the earth’.</p> <p>It’s popular for its healing properties and is delicious in curries.</p> <p>With its tropical-looking foliage and white flower spikes, turmeric looks good planted with other foliage plants, in vegetable beds or large pots.</p> <p><strong>GROW</strong>: Give turmeric a lightly shaded or sunny frost-free position in moist but well-drained soil that is enriched with compost.</p> <p>In spring, plant small rhizomes with at least two eyes 50-70mm deep. Feed with Yates Dynamic Lifter in late spring and summer and water regularly.</p> <p><strong>HARVEST</strong>: As the leaves start to yellow and die back in late autumn, harvest the rhizomes. Dig up the whole plant or carefully dig around the clump and remove the rhizomes as needed.</p> <p>: Grate or chop fresh rhizomes and add to dishes, or dry and use with other spices for curries. Wrap fish in the leaves before barbecuing or steaming.</p> <div class="field field-name-field-slide-title field-type-text field-label-hidden"> <div class="field-items"> <div class="field-item even"><strong>4. Curry leaves</strong></div> </div> </div> <div class="field field-name-field-slide-image field-type-image field-label-hidden"> <div class="field-items"> <p>A curry tree (Murraya koenigii) is a worthwhile investment for lovers of Indian food.</p> <p>The leaves are an essential ingredient of dhal and impart a strong curry-like aroma.</p> <p>A small tree, it grows to about 5m high but can be clipped lower. Its long, slender leaves are dark green on top and a pale green underneath.</p> <p><strong>GROW</strong>: Give a curry tree a sunny position in warm, frost-free regions. Feed in spring with a six-month controlled-release fertiliser.</p> <p>It can be grown in a large pot in frosty areas and put under cover.</p> <p><strong>HARVEST</strong>: Fresh leaves are best, as they lose some flavour when dried.</p> <p><strong>USE</strong>: Curry leaves impart their best flavour if fried in oil when you begin making a curry, and add taste to many Indian dishes.</p> <div class="field field-name-field-slide-title field-type-text field-label-hidden"> <div class="field-items"> <div class="field-item even"><strong>5. Lemongrass</strong></div> </div> </div> <div class="field field-name-field-slide-image field-type-image field-label-hidden"> <div class="field-items"> <p>The young white stem and leaf base of perennial lemongrass (Cymbopogon citratus) is a common ingredient in spicy Asian dishes.</p> <p>If you don’t have room in the kitchen garden, it makes an attractive ornamental plant. But give it space, as it can reach a height and spread of 1.2m.</p> <p>It can be grown in a large pot.</p> <p><strong>GROW</strong>: Position in a sunny spot in well-drained soil in warm, frost-free climates. Feed in spring and summer with a soluble plant food.</p> <p>In cool climates, plant in large pots and protect from frost.</p> <p><strong>HARVEST</strong>: Cut the stalk at ground level from the outside of the clump at any time of the year. Cut stalks can be chopped and frozen.</p> <p><strong>USE</strong>: The soft base of the stalk is used in soups and curries. The green older leaves make a refreshing herbal tea.</p> <div class="field field-name-field-slide-title field-type-text field-label-hidden"> <div class="field-items"> <div class="field-item even"><strong>6. Kaffir lime</strong></div> </div> </div> <div class="field field-name-field-slide-image field-type-image field-label-hidden"> <div class="field-items"> <p>Called the makrut lime in Thailand, the Kaffir lime (Citrus hystrix) is an important ingredient in South-East Asian cooking. It grows to 1.5m high, but if the leaves are constantly being picked for cooking, the plant will usually remain small.</p> <p>The strong taste of the leaves is more popular than the fruit. The fruit is knobbly, and while the flesh is not eaten, the zest is used in cooking.</p> <p><strong>GROW</strong>: Give it a sunny position in well-drained soil. In spring, summer and autumn, feed with a three-month controlled-release fertiliser.</p> <p>In cool climates, grow in a pot and place under cover in the sun in winter.</p> <p><strong>HARVEST</strong>: Pick leaves as needed. The leaves can also be frozen whole.</p> <p><strong>USE</strong>: Kaffir lime leaves are used in green curries, fish and chicken dishes, laksa and soups.</p> <div class="field field-name-field-slide-title field-type-text field-label-hidden"> <div class="field-items"> <div class="field-item even"><strong>7. Chilli</strong></div> </div> </div> <div class="field field-name-field-slide-image field-type-image field-label-hidden"> <div class="field-items"> <p>The chilli (Capsicum annuum), an essential ingredient in many dishes, has been a popular spice for centuries.</p> <p>The fruit follows star-shaped white flowers and comes in many different shapes and sizes. Depending on the variety, chillies ripen from green to shades of red, orange, yellow, brown or purple. They look great in pots.</p> <p><strong>GROW</strong> Give chillies a sunny spot in rich, well-drained soil. Sow seeds or plant seedlings in spring and feed when flowers appear with Yates Dynamic Lifter Plus Fruit Food.</p> <p>Water regularly.</p> <p><strong>HARVEST</strong>: Pick chillies fresh, dry the excess or freeze them whole for later.</p> <p>Always wear gloves or scrub your hands thoroughly after handling chillies, as they can burn your skin. Also avoid rubbing your eyes or any other sensitive areas.</p> <p><strong>USE</strong>: Add zing to scrambled eggs and omelettes with a sprinkling of fresh chilli. Use in Asian dishes, stir-fries, laksa and Indian dishes. </p> </div> </div> </div> </div> </div> </div> </div> </div> </div> </div> </div> </div> </div> </div> </div> </div> </div> </div> </div> </div> </div> </div> </div> </div> </div> <p><em>Written by Handyman Magazine. Republished with permission of <a href="http://www.handyman.net.au/7-plants-grow-and-spice-your-home-cooking">Handyman</a>.</em></p>

Lifestyle

Placeholder Content Image

10 must-read insider tips to save you money on gardening

<div class="field field-name-field-intro field-type-text-long field-label-hidden"> <div class="field-items"> <div class="field-item even"> <p>Whether you buy materials from a farmer’s market, local farmers or chain hardware stores, here’s everything you need to know to get your garden growing on a budget.</p> </div> </div> </div> <p><strong>1. Grow what you eat</strong></p> <p>While this may seem like common sense, it’s easy to get carried away when buying seeds and plants for your garden. Realistically, if you don’t eat a certain vegetable or herb now (kohlrabi and purslane, we’re looking at you), you probably won’t eat it even if you grow it. Save yourself time and money by only buying seeds and plants that you know you and your family will eat. </p> <p><strong>2. Buy seeds early in the year</strong></p> <div class="views-field views-field-field-slides"> <div class="field-content"> <div class="field-collection-view clearfix view-mode-full field-collection-view-final"> <div class="entity entity-field-collection-item field-collection-item-field-slides clearfix"> <div class="content"> <div class="field field-name-field-slide-content field-type-text-long field-label-hidden"> <div class="field-items"> <div class="field-item even"> <p>According to Celeste Longacre, gardening expert and author of Celeste’s Garden Delights, you’ll find the biggest selection of seeds and the best deals in spring. “Many catalogues offer discounts if you buy the seeds before a certain date,” Longacre says. “Companies can also run out of specific varieties so you’ll want to get your order right in.” But you don’t need to plant seeds for every vegetable you intend to eat in the coming months. </p> <p><strong>3. Buy gardening equipment in autumn</strong></p> <div class="views-field views-field-field-slides"> <div class="field-content"> <div class="field-collection-view clearfix view-mode-full field-collection-view-final"> <div class="entity entity-field-collection-item field-collection-item-field-slides clearfix"> <div class="content"> <div class="field field-name-field-slide-content field-type-text-long field-label-hidden"> <div class="field-items"> <div class="field-item even"> <p>Most stores try to clear out their gardening supplies in autumn. You’ll find gardening equipment – like shovels, spades, rakes and buckets – at heavily discounted prices that you can use for next year’s garden. Another great idea is to source good quality second-hand items.</p> <p><strong>4. Go in on seeds with your friends</strong></p> <div class="views-field views-field-field-slides"> <div class="field-content"> <div class="field-collection-view clearfix view-mode-full field-collection-view-final"> <div class="entity entity-field-collection-item field-collection-item-field-slides clearfix"> <div class="content"> <div class="field field-name-field-slide-content field-type-text-long field-label-hidden"> <div class="field-items"> <div class="field-item even"> <p>It may seem counterintuitive, but the more you spend, the more you save, thanks to lower prices for higher volume. “Many companies offer deals if you spend a certain amount of money,” says Longacre. “If you get together with friends on your order, you can save.” If agreeing on seeds is a challenge in your friend circle, consider other uses for your yield. </p> <p><strong>5. Plant crops thicker than they actually grow</strong></p> <div class="views-field views-field-field-slides"> <div class="field-content"> <div class="field-collection-view clearfix view-mode-full field-collection-view-final"> <div class="entity entity-field-collection-item field-collection-item-field-slides clearfix"> <div class="content"> <div class="field field-name-field-slide-content field-type-text-long field-label-hidden"> <div class="field-items"> <div class="field-item even"> <p>You can plant crops like beets, carrots, onions, lettuce, basil and rocket closer together than traditionally prescribed, according Longacre. For example, instead of planting seeds 25mm apart, plant them 13mm apart. This way you can thin them out and eat the thinnings while the crop continues growing. </p> <p><strong>6. Hit up a local farm's harvest sale</strong></p> <div class="views-field views-field-field-slides"> <div class="field-content"> <div class="field-collection-view clearfix view-mode-full field-collection-view-final"> <div class="entity entity-field-collection-item field-collection-item-field-slides clearfix"> <div class="content"> <div class="field field-name-field-slide-content field-type-text-long field-label-hidden"> <div class="field-items"> <div class="field-item even"> <p>The harvest sale is basically the equivalent of a half-yearly or anniversary sale, so you can expect to find amazing deals. Harvest sales usually happen between late March and early May, with the majority being held in April. The earlier in the harvest season you go, the more options you’ll have when it comes to crops, but if you wait longer into May, you’re more likely to nab lower prices, as farmers are trying to unload crops for winter.</p> <p><strong>7. Invest in quality equipment</strong></p> <div class="views-field views-field-field-slides"> <div class="field-content"> <div class="field-collection-view clearfix view-mode-full field-collection-view-final"> <div class="entity entity-field-collection-item field-collection-item-field-slides clearfix"> <div class="content"> <div class="field field-name-field-slide-content field-type-text-long field-label-hidden"> <div class="field-items"> <div class="field-item even"> <p>Spending a little more on quality equipment will be worth it in the long run. Not only will you avoid having to re-buy the same gear each year, but you’re also be less likely to deal with stuff breaking mid-season. Equipment worth spending a little extra on: weeders, shears and pitchforks. But no need to buy fancy or expensive pots and planters. Regular, plastic ones will do.</p> <p><strong>8. Tend to your garden regularly</strong></p> <div class="views-field views-field-field-slides"> <div class="field-content"> <div class="field-collection-view clearfix view-mode-full field-collection-view-final"> <div class="entity entity-field-collection-item field-collection-item-field-slides clearfix"> <div class="content"> <div class="field field-name-field-slide-content field-type-text-long field-label-hidden"> <div class="field-items"> <div class="field-item even"> <p>There will be days when crawling on your hands and knees through the dirt doesn’t sound all too appealing, but doing just that is necessary in order to keep your garden healthy. If you get behind on watering, your plants will die, and you’ll have to spend more on new seeds. If you don’t treat a bug invasion right away, it’ll only get worse and cause more damage, both to your plants and your pockets. “The hardest part of gardening is that things need to be done when they need to be done, not when you feel like doing it,” says Longacre. </p> <p><strong>9. Ask about inventory</strong></p> <div class="views-field views-field-field-slides"> <div class="field-content"> <div class="field-collection-view clearfix view-mode-full field-collection-view-final"> <div class="entity entity-field-collection-item field-collection-item-field-slides clearfix"> <div class="content"> <div class="field field-name-field-slide-content field-type-text-long field-label-hidden"> <div class="field-items"> <div class="field-item even"> <p>A lot of stores offer discounted prices for products that they no longer sell, but still have in back stock. Just make sure you ask why they’ve pulled the product before buying because you don’t want to end up with a mower that doesn’t run or seeds that won’t grow in your climate. “Go to their websites and look for discontinued or clearance items,” advises Longacre.</p> <p><strong>10. Plant at the right time</strong></p> <div class="views-field views-field-field-slides"> <div class="field-content"> <div class="field-collection-view clearfix view-mode-full field-collection-view-final"> <div class="entity entity-field-collection-item field-collection-item-field-slides clearfix"> <div class="content"> <div class="field field-name-field-slide-content field-type-text-long field-label-hidden"> <div class="field-items"> <div class="field-item even"> <p>If you plant your crops too early, they will die. And if you pick your crops too late, they will also die. Timing is everything when it comes to planting your garden. You simply need to choose the right produce for the season and do a bit of research on the climate in your area before selecting when to plant your seeds. </p> <p><em>Source:<span> </span><a rel="noopener" href="https://www.rd.com/home/gardening/gardening-tips-to-save-money/" target="_blank">RD.com</a></em></p> </div> </div> </div> </div> </div> </div> </div> </div> </div> </div> </div> </div> </div> </div> </div> </div> </div> </div> </div> </div> </div> </div> </div> </div> </div> </div> </div> </div> </div> </div> </div> </div> </div> </div> </div> </div> </div> </div> </div> </div> </div> </div> </div> </div> </div> </div> </div> </div> </div> </div> </div> </div> </div> </div> </div> </div> </div> </div> </div> </div> </div> </div> </div> </div> </div> </div> </div> </div> </div> </div> </div> </div>

Lifestyle

Placeholder Content Image

How to grow artichokes

<p><strong>History has not recorded</strong><span> </span>the adventurous gourmet who discovered that the base of the flower scales of the thistle-like globe artichoke – and the base of the flowers – could be eaten. It was a fine discovery, for their delicate yet unmistakable flavour makes artichokes one of the most prized of all garden vegetables. They are not only delicious but also strikingly beautiful, their silvery grey leaves providing a perfect foil for summer flowers. For this reason, they are often grown in herbaceous borders.</p> <h4>Planning the crop</h4> <p>Globe artichoke plants will not always survive severe winters and it is best to grow them in a sheltered, sunny part of the garden in severe-winter areas. Good soil preparation is well repaid. Loosen the soil to a depth of 60 cm and work through plenty of compost and manure. These plants need excellent drainage, and loams or sandy loams are ideal. Or plant in raised beds. They are tolerant of salt sea breezes. They need a chilling period to flower well.</p> <p><strong>How many to grow:</strong><span> </span>It depends on how popular artichokes are in your household – and how much space you have. Plants need to be set 1 m apart, but if space is tight, you can plant singly at the back of a herbaceous or mixed border. Globe artichokes will grow to a height of 1.2-1.5 m.</p> <p><strong>Varieties:</strong><span> </span>Green Globe and Purple Globe are most widely available. Purple Globe is hardier and best in cooler areas. Now gourmet heirloom varieties are also sought. Deep purple Romagna Violet and purple-tinged Romanesco from Italy and Gros Vert de Laon from France are propagated from seed.</p> <h4>Growing tips</h4> <p>Artichokes will grow and flower for about six years; the heads get smaller and tougher after three or four years. Replace a few plants each year so that you always have new plants maturing and some old ones dying down. To start a crop, buy young plants or suckers in spring and plant in soil to the same depth as they were in the nursery bed or pot.</p> <p>Every year, apply a liberal mulch of manure or compost in spring. During dry periods, especially when plants are growing strongly, make sure that they are well watered. The new plants will provide a few heads by late summer, particularly if well fed with manure and potash to encourage flowering. Frost protection is essential in areas with severe winters. Cut the plant back to about 30 cm above ground.</p> <p>Mound soil around the plant, taking care not to cover the crown. Put a good layer of autumn leaves on top and anchor with a double layer of horticultural fleece. In the second and third years, allow each plant to develop only four to six stems. Leave the flower on the main stem – called the king head – as well as a few other flowers at the end of the lateral shoots. Remove any offshoots around the base as this will help to keep the plant productive.</p> <p><strong>Raising new plants:</strong><span> </span>During spring and late autumn in mild climates, select strong shoots about 25 cm high on plants that are at least three years old. Cut vertically alongside each shoot with a spade or sharp knife, keeping part of the rootstock below. In cold areas prone to frost, pot up offshoots in containers, and plant out in their permanent positions as soon as the danger of frost has passed.</p> <h4>Pests and Diseases</h4> <p>Artichokes are generally pest-free, apart from slugs and snails in damp conditions and aphids. Major diseases are verticillium and fusarium wilt.</p> <h4>Harvesting and Storing</h4> <p>Mature plants produce ripe heads in November and December. Pick them, starting with the king head, when the bracts are still tightly wrapped. Use a sharp knife or secateurs to cut off a head with a 12 cm stem, then cut back each stem to about half its original length. The flower heads on the lateral shoots are best picked when about hen’s-egg size. Very small, young heads can be cooked and eaten whole. You can place the stems in lightly sugared water and store in the refrigerator for a few days.</p> <p><strong>At-a-glance timetable</strong></p> <p><strong>Planting:</strong><span> </span>late autumn or spring</p> <p><strong>Mulching:</strong><span> </span>late spring to early summer</p> <p><strong>Harvesting summer:</strong><span> </span>first year to fourth year</p> <p><strong>Removal of offshoots:</strong><span> </span>late autumn or spring, second year onwards</p> <p class="p1"><em>Written by Reader's Digest Editors. This article first appeared in <a href="https://www.readersdigest.com.au/gardening-how-to-grow/how-to-grow-artichokes">Reader’s Digest</a>. </em></p>

Lifestyle

Placeholder Content Image

10 tips on how to help your indoor garden thrive

<p>Plants bring life and colour into the home and require little in the way of maintenance. Follow these simple tips and your plants should flourish.</p> <div class="at-below-post addthis_tool" data-url="https://www.readersdigest.com.au/gardening-tips/how-help-your-indoor-garden-thrive"><strong>1. Position plants carefully</strong></div> <p>Look for the best place in the house for each plant, and don’t be afraid to try different locations until you find the best spot. </p> <p><strong>2. Re-create a forest floor</strong></p> <p>If a room seems too dark to sustain a healthy plant, don’t be fooled. Most indoor plants originate in tropical and subtropical regions, in particular equatorial forests, and they thrive in dim environments and filtered light. The ideal spot is in front of a large window facing east or west, filtered if necessary through a net scrim curtain.</p> <p><strong>3. Sun-lovers face north</strong></p> <p>If you have a plant that thrives on lots of sun, place it on a windowsill facing north or north-east. Check soil moisture levels regularly and inspect the leaves to check they are not being burned. At the slightest sign of withering, move the plant towards the middle of the room.</p> <p><strong>4. Plants for the bathroom</strong></p> <p><span>Ferns and other moisture-loving plants do best in vaporous rooms like bathrooms where they can lap up regular doses of mist.</span></p> <p><strong>5. Water from the bottom</strong></p> <div id="page6" class="slide-show"> <div id="test" class="slide"> <div class="slide-description"> <p>Water poured directly onto the soil may flood, or not reach the pot plant’s roots. Instead, water plants bottom up by standing them in a dish and filling the dish with water. Delicate plants such as fuchsias thrive on this method. For this method to work, all pots should have holes in the bottom through which the water is absorbed.</p> <p><strong>6. Keep away from drafts</strong></p> <div id="page7" class="slide-show"> <div id="test" class="slide"> <div class="slide-description"> <p>If you don’t want your plant to die of heat or cold, avoid placing it in draughty areas or near ducted heat or air-conditioning outlets.</p> <p><strong>7. Do not over water</strong></p> <div id="page8" class="slide-show"> <div id="test" class="slide"> <div class="slide-description"> <p>Water your plants only when the potting mix feels dry to the touch – over watering is often the cause of indoor plant death. Check by pushing your finger into the soil; if it comes out without any trace of soil on it, start watering. Remember that plants may need more frequent watering in summer.</p> <div class="at-below-post addthis_tool" data-url="https://www.readersdigest.com.au/gardening-tips/how-help-your-indoor-garden-thrive"><strong>8. Remember, plants like to be misted</strong></div> <div class="at-below-post addthis_tool" data-url="https://www.readersdigest.com.au/gardening-tips/how-help-your-indoor-garden-thrive"> <div id="page9" class="slide-show"> <div id="test" class="slide"> <div class="slide-description"> <p>Most indoor plants benefit from an occasional misting of water. Make sure the water is at room temperature and use an atomizer or spray bottle. Misting is particularly beneficial if you live in a centrally heated or air-conditioned house as the air can become very dry.</p> <p><strong>9. Apply some fertiliser</strong></p> <p>Feed your plants with small amounts of fertiliser. The fastest and simplest solution is complete liquid fertiliser in the recommended dose, usually every two to four weeks – check the label. </p> <p><strong>10. Use ice cubes</strong></p> <p>An efficient way to water your plants directly at a steady rate is to use ice cubes. Put a couple on top of the pot soil and leave them to melt.</p> <div id="page11" class="slide-show"> <div id="test" class="slide"> <div class="slide-description"> <p class="p1"><em>Written by Brenda Schmerl. This article first appeared in <a rel="noopener" href="https://www.readersdigest.com.au/gardening-tips/how-help-your-indoor-garden-thrive" target="_blank">Reader’s Digest</a>. </em></p> </div> </div> </div> </div> </div> </div> </div> </div> </div> </div> </div> </div> </div> </div> </div> </div>

Lifestyle

Placeholder Content Image

How to get the grandkids involved in gardening

<p>Gardening can be a lot of fun for kids, giving them the chance to get outside and grub around in the dirt. </p> <p>And if you give kids an area outdoors to call their own, they’ll be rolling up their sleeves in no time. </p> <p>The vegetable garden is a great starting point and a wonderful way for them to develop an understanding of where fresh food comes from. </p> <p>You’ll be surprised how many more vegies they are likely to accept on the dinner plate when they’ve grown them with their own hands.</p> <p>Let them add a scarecrow and it will become their favourite spot. </p> <p>Watering and weeding take up only so much time, so to really keep kids interested between sowing and harvesting crops they need to have a stake in the garden. </p> <p>The best way to do this is to create a kid-friendly landscape and this is possible whether you have a large garden, small courtyard or balcony. </p> <p>Use raised beds to give children a dedicated growing area, mark out kids-only spots using puppets, or decorate lights to hang outdoors and you won’t be able to keep them away.   </p> <p><strong>Watch a scarecrow </strong></p> <p>As a reward for the hard work of sowing garden beds and to give the vegie patch a guardian, help the kids make and dress a scarecrow to protect their crops from birds. </p> <p><strong><u>SINK A STAKE</u></strong> up to 3m high about 600mm into the ground, securing a crosspiece 300mm from the top.</p> <p><strong><u>ADD CLOTHES</u></strong> and stuff with grass clippings, woodchips or rags, tying the waistband and pant legs in place. </p> <p><strong><u>MAKE A HEAD</u></strong> from nylon tights or a hessian sack, stuffing it with plastic bags and securing to the stake with twine. Add a face and hat to finish. </p> <p><strong>TIP: </strong>Use bright colours to deter birds. </p> <p><strong>Garden craft </strong></p> <p>Take the time to look and you’ll find your garden is a great source of craft supplies, including seed pods, colourful foliage and flowers, twisted branches and straight twigs. </p> <p>A collection of goodies from the garden works well to create markers for paths and garden beds. </p> <p>Just add a few colourful pipe cleaners and Paddle-Pop sticks, then grab a hot glue gun and you’re all set to create anything your imagination can conjure up.</p> <p>This alien stick puppet was assembled using a glue gun, under adult supervision, to join porous materials and the shiny seedpods.</p> <p><strong>TIP:</strong> When removing a part of a plant, trim it with secateurs rather than tearing it off by hand.</p> <p><strong>Designing a flower press</strong></p> <p>Pressed and dried flowers make beautiful keepsakes or additions to art and craft projects. </p> <p>A flower press is a simple device that features a rigid base and top plate with bolts through each corner. </p> <p>To make your own press, cut two 300 x 300mm squares from 9mm marine or exterior ply. </p> <p>Drill holes about 20mm in from the corners, insert the bolts and secure threaded drawer knobs over the top.</p> <p><strong>TIP:</strong> You can also use wing nuts. </p> <p>To adjust the size of the press simply cut the plywood larger or smaller. For scrapbooks or albums you may want it A4 size. </p> <p>Position the flowers and leaves between layers of paper on the base plate then add the top plate.</p> <p>Wind the knobs to tighten the bolts and draw the top and base plates together, compressing the contents of the press. </p> <p>Change the paper every few days until the flowers or leaves have dried.</p> <p><strong>Watch the weather </strong></p> <p>Add a rain gauge to the garden and open up a new world for kids to explore. It is a simple and fun learning tool that helps children appreciate the importance of climate in their garden. The best spot is somewhere that’s frequently visited like the vegie garden.</p> <p><strong><u>POSITION THE RAIN GAUGE</u></strong> high enough so water won’t splash into it and in an area clear from overhanging buildings or trees. A large, securely mounted, seasoned hardwood garden stake is an ideal mounting point.</p> <p><strong><u>KEEP RECORDS</u></strong> to help kids learn how to track data and look at summarised results. Create a spreadsheet and graph that tallies the monthly and annual rainfall.  </p> <p><strong>Outdoor lights </strong></p> <p>Turn your garden into a fairy wonderland after dark by adding handmade lanterns. </p> <p>All you need is glass paint, LED tea-light candles and glass containers or bottles in just about any shape you can find.</p> <p>To hang lanterns from trees in the garden, decorate jars with wire handles. If you don’t have any, choose jars with a lip and make a hanger using galvanised tie wire from the hardware store.</p> <p>Paint markers make it easy to create pictures and patterns on glass candle holders of all shapes and sizes. </p> <p>They cost from $5 each, from Officeworks, resist fading and come in a range of colours including metallics. </p> <p>Get the kids to practise first on a piece of paper the same size as the surface to be painted.</p> <p><strong>TIP:</strong> If using real candles, don’t paint on the side exposed to the flame.</p> <p><em>Republished with permission of </em><a href="http://www.handyman.net.au/gardening-kids"><em>Handyman Australia</em></a><em>.</em></p>

Lifestyle

Placeholder Content Image

How to repot a plant the right way

<p>Plants are often left in the pots they came home in, but those plastic containers don’t do much for outdoor aesthetics and nursery sizes are only to be used for a limited period.</p> <p>When a plant outgrows its pot, it becomes hard for it to take up oxygen, moisture and nutrients, so growth may suffer, and the plant could die.</p> <p>When choosing a container, the main points to consider are drainage, the weight after potting mix is added and how porous the material is.</p> <p>“Consumer tastes have evolved from basic terracotta and glazed pots, with the new products made from composite materials now in demand,” says Simon Hupfeld of Northcote Pottery.</p> <p>“Lightweight materials like fibre clay and glass reinforced cement are especially popular and offer many practical benefits given their increased manoeuvrability and functionality.”</p> <p>When it’s time to repot, use the opportunity to update your containers, selecting colours, shapes and sizes that can be used to create a few showpieces in the garden.</p> <p>“We have noticed a move away from plain finishes on pots towards textured surfaces and the addition of subtle details that accent the pot and add character,” says Simon. </p> <p>“Our latest range features a wide variety of finishes and details, from stone and rustic textures to scrolls and floral patterns.”</p> <p><strong>Choosing a container </strong></p> <p><strong><u>Terracotta containers</u></strong> are porous and dry out quickly, making them perfect for plants and herbs that need good drainage such as lavender and rosemary. Painting the interior walls with a pot sealer can reduce evaporation for thirstier plants.</p> <p><strong><u>Plastic pots</u></strong> are lightweight, inexpensive and easy to move around but don’t provide protection against temperature extremes. Plant roots can get hot in summer and cold in winter, which can affect growth.</p> <p><strong><u>Stone, ceramic and concrete</u></strong> pots are heavy, but less likely to dry out on hot or windy days than terracotta and are good at keeping an even temperature in the soil.</p> <p><strong>Drainage solutions </strong></p> <p>Pots can provide excellent drainage, but the plants depend on you for water and nutrients. </p> <p>Consider each plant when repotting, choosing a slightly larger container with good drainage. </p> <p>Five to seven holes around the edge of the pot base provide better drainage than one in the middle.</p> <p>Drill extra holes or pop a smaller well-draining pot into a container with no holes, elevating it slightly.</p> <p>Regularly empty the excess liquid that collects in the larger pot to stop mosquitoes breeding and reduce the risk of stagnant water smells.</p> <p><strong>Recycled Planters </strong></p> <p>Another option for growing in pots is to make use of recycled objects. Take a creative approach and mix a random collection for a display that dazzles.</p> <p>Wheelbarrows, buckets and even an old laundry tub can all be turned into homes for plants. Whatever the container, the size determines the type of species that can be grown.</p> <p>Shallow-rooted vegies like lettuce or chives grow well in small vessels about 200mm deep. Plants with long root systems like carrot and parsnip need larger, deeper containers. </p> <p><strong>TIP:</strong> To improve drainage, add a layer of gravel to the base of the container.</p> <p><strong>Repot a root-bound plant </strong></p> <p>Before repotting, soak the plant in its pot in a bucket of diluted Seasol for 10 minutes to reduce the stress of the procedure. TIP Don’t repot plants on a very hot day.</p> <p><strong>Step 1. Trim the roots</strong></p> <p>Trim the roots growing out of the drainage holes using sharp secateurs for a clean cut.</p> <p><strong>Step 2. Tease the rootball</strong></p> <p>Tease out the rootball by hand to encourage roots to grow down rather than around the pot wall.</p> <p><strong>Step 3. Plant and water</strong></p> <p>Water in well after planting into a slightly larger pot with fresh potting mix and firming it down.</p> <p><em>Republished with permission of <a href="http://www.handyman.net.au/how-repot-plant">Handyman Australia</a>.</em></p>

Lifestyle