Placeholder Content Image

Lady Louise Windsor has surprising new job

<p dir="ltr">Lady Louise Windsor, one of Queen Elizabeth’s numerous grandchildren, has joined the thousands of young people in a tradition as old as time itself: getting a summer job.</p> <p dir="ltr">Though she might be a royal, the 18-year-old’s new job is quite ordinary, with reports that she is earning £6.83 ($AU 11.68 or $NZ 13.03) at a garden centre.</p> <p dir="ltr">According to <em>The Sun</em>, Lady Louise was spotted by a shopper, pruning and potting plants, as well as greeting customers and serving them behind the till.</p> <p dir="ltr">The shopper described the daughter of Prince Edward and Sophie, the Countess of Wessex, as “modest”, “sweet” and “polite”.</p> <p dir="ltr">“I couldn’t believe it was Lady Louise – I had to look twice,” the shopper told the newspaper.</p> <p dir="ltr">“She is a really modest and sweet young woman who is polite and attentive to customers. She seemed to be loving the job.</p> <p dir="ltr">“You’d never imagine the Queen’s granddaughter would take on a role working behind a till.”</p> <p dir="ltr">It’s believed Lady Louise is working at the garden centre several days a week, with the news coming after a Buckingham Palace spokesperson confirmed she would be studying English at the University of St Andrew’s after finishing her A-levels in June.</p> <p dir="ltr">Though she is 16th in line for the throne, Lady Louise and her brother, James, don’t use an HRH title, nor are they expected to carry out duties when they’re older.</p> <p dir="ltr">As unexpected as the royal’s job appears, it seems to have delighted fans of the monarchy, with one fan telling <em>The Sun</em>: “It’s not every day you buy begonias off a royal.”</p> <p><span id="docs-internal-guid-40e9b517-7fff-cd84-bd70-3ee69a7e173c"></span></p> <p dir="ltr"><em>Image: Getty Images</em></p>

Lifestyle

Placeholder Content Image

Woman shares genius cereal storage hack

<p>A new kitchen hack has taken over social media by storm, with people praising the food storage trick as “brilliant”.</p> <p>Cereals are commonly stored in a plastic container or simply left in the packaging box. However, a UK woman has revealed the way to properly store cereal boxes to minimise the risk of going stale.</p> <p>In a Facebook post, Becky Holden-McGhee wrote: “It’s only taken me 40 years, but I now know the correct way to close a cereal box.</p> <p>“Genius. It takes seconds, no more dried up cereal and ugly torn boxes to greet me every morning.”</p> <p><iframe src="https://www.facebook.com/plugins/post.php?href=https%3A%2F%2Fwww.facebook.com%2Fbecky.holden.923%2Fposts%2F10163890423985508&amp;show_text=true&amp;width=552&amp;height=706&amp;appId" width="552" height="706" style="border: none; overflow: hidden;" scrolling="no" frameborder="0" allowtransparency="true" allow="encrypted-media"></iframe></p> <p>Holden-McGhee told <em>Metro.co.uk</em> she adopted the trick from an American woman on her online feed. ”I was like, ‘that looks amazing but I don’t think I’m going to be able to do that’,” she said.</p> <p>“Because you see these hacks don’t you, but in reality they’re not that easy to do.”</p> <p>Her post has received hundreds of comments and been shared more than 110,000 times.</p> <p>“I can’t keep up with every single comment now because it’s gone a little bit crazy, but everyone has just been like ‘wow’ and ‘who knew?’” she told the outlet.</p> <p>“Loads and loads of people have shared pictures of their own cereal boxes, which is so cute.”</p> <p>The trick to sealing a cereal box is to fold the two small flaps on the sides and one of the long sides inside. Pinch the two sides of the box so that the sides fold in to close like a milk carton. From then, the remaining long side can be folded into the box.</p> <p><em>Image: Becky Holden McGhee/Facebook </em></p>

Lifestyle

Placeholder Content Image

Garden-fresh asparagus soup

<p>Love the healthy snap of a bright-green new-season asparagus stalk? Enjoy their uniquely grassy, sweet flavour and their healthy-bacteria-boosting proteins in this fresh and uplifting soup.</p> <p><strong>Ingredients:</strong></p> <ul> <li>2 tablespoons butter</li> <li>2 tablespoons extra virgin olive oil, plus extra to serve</li> <li>2 spring onions (scallions), finely chopped, plus extra, curled in cold water, to serve</li> <li>1/2 teaspoon curry powder</li> <li>1/4 teaspoon ground ginger</li> <li>1/2 teaspoon ground turmeric grated zest and juice of 1 lemon</li> <li>2 medium turnips, peeled and diced</li> <li>750 ml (3 cups) vegetable stock</li> <li>270 ml tin additive-free coconut milk</li> <li>175 g (1 bunch) asparagus, cut into 1.5 cm pieces</li> <li>1/2 teaspoon Celtic sea salt</li> <li>freshly cracked black pepper, to taste</li> </ul> <p><strong>Directions:</strong></p> <ol> <li>Melt the butter with the oil in a large saucepan over medium heat.</li> <li>Add the spring onion and cook, stirring frequently, until soft. Add the curry powder, ginger, turmeric, lemon zest, juice and turnip and cook, stirring frequently, for 5 minutes.</li> <li>Add the stock, coconut milk and asparagus, and simmer, partially covered, for 15 minutes or until the turnip is tender, then add the salt.</li> <li>Remove from the heat and allow to cool slightly, then purée the mixture in batches in a food processor or blender until smooth.</li> <li>Reheat gently if necessary, then drizzle with olive oil, grind over black pepper and garnish with curled spring onion.</li> </ol> <p><em>Recipe and image from <a rel="noopener" href="https://www.murdochbooks.com.au/browse/books/healthy-cooking/Heal-Your-Gut-Lee-Holmes-9781743365601" target="_blank"><span>'Heal Your Gut'</span></a> by Lee Holmes (Murdoch Books).</em></p> <p><em>Republished with permission of <a rel="noopener" href="https://www.wyza.com.au/recipes/garden-fresh-asparagus-soup.aspx" target="_blank">Wyza.com.au</a>. </em></p>

Lifestyle

Placeholder Content Image

6 things you didn't know you could compost

<p>As more people aim to lessen their carbon footprint, there’s been a quest to learn about all the things you can upcycle, recycle and compost. And you may be surprised to learn some of the things you can add to your compost bin.</p> <div class="at-below-post addthis_tool" data-url="https://www.readersdigest.com.au/food-home-garden/home-tips/10-things-you-didnt-know-you-could-compost"><strong>1. Natural-fibre clothes</strong></div> <div class="at-below-post addthis_tool" data-url="https://www.readersdigest.com.au/food-home-garden/home-tips/10-things-you-didnt-know-you-could-compost"> <p>If you have natural-fibre clothing – pure wool, cotton, silk, or linen – that is too old or damaged to donate, then cut it up in chunks so it breaks down faster and add it to your compost pile! If you do compost clothes, be sure that there are no synthetic threads, plastic buttons, metal zippers, or stains from motor oil, paint, wood stain and other non-compostable substances.</p> <p><strong>2. Wine corks</strong></p> <p>The next time you’re recycling your wine bottles, throw their corks into the compost pile. Corks are a natural product, and although some wineries are now using plastic corks that look a lot like the real thing, remember that you can compost the wine stoppers if they are made of natural cork.</p> <p><strong>3. Fur, hair and nail clippings</strong></p> <p>If you have a pet pup or cat that sheds more than you like, hopefully you can find at least some solace in the fact that you can compost their fur! You can also clean out your and your family’s hair brushes and add all nail clippings to the compost heap. It may be a little gross but your compost will be happy about it.</p> <p><strong>4. Vacuum bag contents</strong></p> <div id="page9" class="slide-show"> <div id="test" class="slide"> <div class="slide-description"> <p>Typically, the stuff your vacuum picks up is composed of compostable materials: dust, hair, dirt, etc. In some cases, even the vacuum bag itself can be composted if it’s made from natural products (be sure to check the bag to see what it’s made of). If you have a bagless vacuum, the contents of the dirt collection cup can be dumped directly into your compost pile. So, unless you’re vacuuming up after a glittery birthday party, your vacuum dirt should be okay to compost.</p> <div class="at-below-post addthis_tool" data-url="https://www.readersdigest.com.au/food-home-garden/home-tips/10-things-you-didnt-know-you-could-compost"><strong>5. Used loofahs and sponges</strong></div> <div class="at-below-post addthis_tool" data-url="https://www.readersdigest.com.au/food-home-garden/home-tips/10-things-you-didnt-know-you-could-compost"> <p>If you’re using a natural loofah, then remember that you can tear that thing up and compost it the next time you’re ready to replace it. If you’re currently using synthetic sponges, consider making the switch to a natural one. Man-made sponges can carry germs and add a ton of waste to the environment if you’re going through them regularly.</p> <p><strong>6. Cotton swabs and balls</strong></p> <div id="page10" class="slide-show"> <div id="test" class="slide"> <div class="slide-description"> <p>Consider adding a tiny compost rubbish bin to your bathroom so you can collect all the compostable bathroom garbage. As long as the cotton swabs you’re using are plastic-free, you can add those to the bin along with cotton balls and toilet paper rolls. Just be sure that the dental floss doesn’t get in there.</p> <div class="at-below-post addthis_tool" data-url="https://www.readersdigest.com.au/food-home-garden/home-tips/10-things-you-didnt-know-you-could-compost"> <div id="page11" class="slide-show"> <div id="test" class="slide"> <div class="slide-description"> <p><em>Source:<span> </span><a rel="noopener" href="https://www.rd.com/home/cleaning-organizing/things-didnt-know-could-compost/" target="_blank">RD.com</a></em></p> <div class="at-below-post addthis_tool" data-url="https://www.readersdigest.com.au/food-home-garden/home-tips/10-things-you-didnt-know-you-could-compost"> <p><em>Written by Hannah Louise. This article first appeared in </em><a href="https://www.readersdigest.com.au/food-home-garden/home-tips/10-things-you-didnt-know-you-could-compost"><em>Reader’s Digest</em></a><em>. </em></p> </div> </div> </div> </div> </div> </div> </div> </div> </div> </div> </div> </div> </div>

Lifestyle

Placeholder Content Image

10 absolutely brilliant uses for old socks

<p>Here are ten absolutely brilliant uses for old socks.</p> <p><strong>1. Prevent floor scratches</strong></p> <p>When moving furniture at home, put socks on the feet of your chair or table legs to prevent scratching the floors.</p> <p><strong>2. Dust high places</strong></p> <p>To dust extra-tall (e.g., on ceilings) or extra-narrow (under appliances or radiators) spots, fasten a sock to the end of a yardstick or a broom, dampen, and clean (chenille socks are especially good at picking up dust).</p> <p><strong>3. Clean houseplants</strong></p> <p>Put your hand in a sock, dampen it, and use it as a mitt to clean houseplants of dust and other debris.</p> <p><strong>4. Soften laundry</strong></p> <p>To soften laundry without using fabric softener or dryer balls, take a couple of socks, put a tennis ball inside each, knot them, and throw into the dryer before running your next load of laundry.</p> <p><strong>5. Sleep mask</strong></p> <p>Fashion a sleep mask with an old sock, some flat backing fabric, and an elastic band.</p> <p><strong>6. Sticky jar cover</strong></p> <p>Keep your cupboard and refrigerator clean by deploying single socks to cover the bottoms of bottles or jars containing messy, sticky, drippy stuff like syrup, honey, molasses, and barbecue sauce.</p> <p><strong>7. Pan handle cover</strong></p> <p>Stash socks in the kitchen where they’re surprisingly useful. For starters, when cooking on the stove, slip one over the handle of your saucepan or frying pan; this will not only shield your hand from the heat but also prevent the handle from getting sticky.</p> <p><strong>8. Wrist rest</strong></p> <p>For an ergonomic wrist rest for your computer, take a sock, stuff it with filling, and sew it closed. Whether it resembles a ferret, cat, another mammal, or no animal at all is up to you and your preferences and skill.</p> <p><strong>9. Get rid of cramps</strong></p> <p>Combat aches and cramps with a DIY heating pad. Just fill a clean, dry sock (use one that’s all or mostly cotton or wool, with no embellishments) with white or brown rice (not the instant or quick-cooking kind), dried beans, flaxseed or barley. Either knot the sock or sew it shut with cotton thread, and microwave it for one minute. If it’s not hot enough, up the time in 15-second increments.</p> <p><strong>10. Stop the fog</strong></p> <p>Fill socks with silica kitty litter (which is extremely absorbent), and keep them on rear and/or front window ledge to stop windshields from fogging up.</p> <p><em>Source: <a href="https://www.rd.com/home/cleaning-organizing/uses-for-old-socks/">RD.com</a></em></p> <p><em>Written by Daryl Chen. This article first appeared in </em><a href="https://www.readersdigest.com.au/food-home-garden/home-tips/65-absolutely-brilliant-uses-for-old-socks"><em>Reader’s Digest</em></a><em>. </em></p>

Lifestyle

Placeholder Content Image

4 things you're doing to your home that real estate agents wouldn't

<p>Every day, real estate agents come upon cringe-worthy things homeowners have done to their homes. Leopard-print fabric wallpaper in the bedroom – yep. DIY electrical repairs – shockingly true. Sure, it’s your castle, and you can decorate or DIY to your heart’s content, as well as skip certain projects you just don’t think are important. But there are some smart reasons why real estate agents wouldn’t do the following things to their own homes.</p> <p><strong>1. Ignoring kerb appeal</strong></p> <p>You worked for months on the interior of your home, and now that it’s Instagram-worthy, you’re too tired and uninspired to care about the shabby lawn and cracked walkway. Shake off the sawdust and swap out your tool belt for some gardening tools. “It pays to hire a professional to get some advice to ‘stage’ your yard, too,” says real estate broker Kelly Parks. “A bonus is that while you live there, you will also love it.”</p> <p><strong>2. Planting trees too close to the house</strong></p> <p>Leafy trees, flowering bushes and colourful perennials instantly add a welcoming and homey touch to that all-important kerb appeal, but if you plant trees too close to the house, you might regret it down the road. Trees with long root systems can uproot the ground and your budget, and large limbs can fall on the roof or damage siding. “Roots over time can damage underground plumbing, foundation and driveways,” explains realtor Maya Madison. “It may look nice at first, but when you go to sell it in a few years, those roots will cause very expensive damage.”</p> <p><strong>3. Over-customising</strong></p> <p>A house is transformed into a home-sweet-home when you add personal touches, but if you’re thinking about selling your house down the road, you might want to rethink going all-in with your favourite motif. Broker Melanie Everett loves animal prints, but she’s not going to wallpaper her house with it. “I opted to buy some beautiful pillows instead,” she says. “Plus, I can take these with me to my next home, and I don’t have to worry about overwhelming a potential buyer.”</p> <p><strong>4. Hiring non-licenced contractors</strong></p> <p>It’s probably not a big deal to DIY a loose floorboard or hire your cousin to install a ceiling fan, but when it comes to the major housing components like plumbing and electrical, you should hire licensed, bonded contractors and possibly get permits. “This is very important because real estate agents know the value of being able to say that a licensed contractor or expert did the work,” says Parks. “This gives a potential buyer peace of mind, knowing that things are right, and the same is true when they go to sell the house later.”</p> <p><em>Source: </em><a href="https://www.rd.com/home/things-real-estate-agents-wouldnt-do/"><em>RD.com</em></a></p> <p><em>Written by Lisa Marie Conklin. This article first appeared in <a href="https://www.readersdigest.com.au/food-home-garden/diy-tips/13-things-youre-doing-to-your-home-that-real-estate-agents-wouldnt">Reader’s Digest</a>. </em></p>

Lifestyle

Placeholder Content Image

5 ways to enrich garden soil

<p>Healthier garden soil means healthier plants. It is the foundation of successful gardening and thus worth paying attention to.</p> <p>Here are 5 ways you can enrich your garden soil.</p> <p><strong>1. Spread grass</strong></p> <div id="page1" class="slide-show"> <div id="test" class="slide"> <div class="slide-description"> <p>Grass clippings add nutrients as they decompose. They also provide shade, keeping roots cool and reducing water loss in hot weather.</p> <p>Mix them with leaf litter or dig into the soil to avoid them forming a mat that will repel water.</p> <div class="at-below-post addthis_tool" data-url="https://www.handyman.net.au/5-ways-enrich-garden-soil"><strong>2. Use manure</strong></div> <div class="at-below-post addthis_tool" data-url="https://www.handyman.net.au/5-ways-enrich-garden-soil"> <div id="page2" class="slide-show"> <div id="test" class="slide"> <div class="slide-description"> <p>Cow manure improves soil micro-organisms and chicken manure, which is high in nitrogen and phosphorus, is great for the lawn and vegie patch.</p> <p><strong>TIP:</strong><span> </span>Don’t use manure from carnivores, such as dogs and cats.</p> <div class="at-below-post addthis_tool" data-url="https://www.handyman.net.au/5-ways-enrich-garden-soil"><strong>3. Lay straw</strong></div> <div class="at-below-post addthis_tool" data-url="https://www.handyman.net.au/5-ways-enrich-garden-soil"> <div id="page3" class="slide-show"> <div id="test" class="slide"> <div class="slide-description"> <p>Lucerne hay and pea straw strengthen the soil, so they’re highly recommended. They also break down fairly quickly, which gives the soil a quick nutrient injection, and can be dug in to speed up the process.</p> <div class="at-below-post addthis_tool" data-url="https://www.handyman.net.au/5-ways-enrich-garden-soil"><strong>4. Use bark</strong></div> <div class="at-below-post addthis_tool" data-url="https://www.handyman.net.au/5-ways-enrich-garden-soil"> <div id="page4" class="slide-show"> <div id="test" class="slide"> <div class="slide-description"> <p>These mulches take longer to break down, so they don’t need applying as often.</p> <p>They shade the soil, help retain moisture, repel weeds and look decorative, but don’t add many nutrients to the plants.</p> <div class="at-below-post addthis_tool" data-url="https://www.handyman.net.au/5-ways-enrich-garden-soil"><strong>5. Add compost</strong></div> <div class="at-below-post addthis_tool" data-url="https://www.handyman.net.au/5-ways-enrich-garden-soil"> <div id="page5" class="slide-show"> <div id="test" class="slide"> <div class="slide-description"> <p>A well-rounded source of goodness, compost allows water to penetrate the soil. It provides slow-release nutrients, attracts worms and encourages a healthy root system. Best of all, you can make it from kitchen scraps.</p> <div class="at-below-post addthis_tool" data-url="https://www.handyman.net.au/5-ways-enrich-garden-soil"> <p><em>Written by Handyman. Republished with permission of </em><a href="https://www.handyman.net.au/5-ways-enrich-garden-soil"><em>Handyman</em></a><em>. </em></p> </div> </div> </div> </div> </div> </div> </div> </div> </div> </div> </div> </div> </div> </div> </div> </div> </div> </div> </div> </div>

Lifestyle

Placeholder Content Image

How to know what weeds to pull and what to leave in the garden

<p>One of the least favourite but essential chores that must be performed regularly in the garden would have to be weeding.</p> <p>Because they are often attractive, easy-to-grow plants that thrive, weeds can quickly become invasive and destroy other less rigorous plants if they are left unchecked.</p> <p>The Australian government has produced a<span> </span><a rel="noopener noreferrer" href="http://www.environment.gov.au/biodiversity/invasive/weeds/weeds/lists/wons.html" target="_blank">national watchlist</a><span> </span>of plants that should be avoided in your garden at all costs.</p> <p>If allowed to take root and spread, they quickly turn the backyard into an unkempt mess.</p> <p>Manager of the government’s National Weeds Strategy Project John Thorp, says, ‘Weeds are any plants growing out of place, such as on paths, in lawns or in a home garden, that a person wishes to control.’</p> <div class="advertisements"><strong>State of origin</strong></div> <div class="advertisements"> <p>Location is key in weed warfare, as species that are classified as a dangerous weed in a particular state or territory may be seen as a welcome garden plant in another.</p> <p>“Australia is affected in most places by weeds, but they change because we go from the tropics to temperate climates,” says John.</p> <p>“What may be an indoor plant in Tasmania could easily be considered a weed in the tropics.</p> <p>“You also get subtropical vines which scramble over canopies.</p> <p>“They’re a problem, especially in the Macleay River area in New South Wales where they really damage the bushland,” says John.</p> <p><strong>Garden invaders</strong></p> <p>There are 32 weeds listed by the federal government as having national significance.</p> <p>Many, including the most common one, lantana, are referred to as garden escapes.</p> <p>“That is, they’ve literally escaped from the garden,” explains John.</p> <p>“Birds typically spread the plants by picking up the seeds and flying over the neighbour’s place, dropping a few along the way and eventually heading into bushland.</p> <p>“The culprits include a range of black birds like the currawongs, which are frugivores.”</p> <p>Some of the most common backyard plants that turn into weeds this way include the fast-growing asparagus weed, which the birds prey on for their berries.</p> <p>Other widespread garden weeds are brooms, which come in different coloured varieties but are most common with yellow flowers.</p> <p>All types of broom, regardless of colour, are prolific seed producers. Cat’s claw creeper, Madeira vine and cacti are also garden weeds.</p> <p>“Cacti are a major problem if you are in a dry place,” says John.</p> <p>“Australia was overrun at one time with a type of cactus, the prickly pear. The opuntioid cacti are a whole group of plants that could easily invade entire dry parts of Australia.”</p> <p><strong>Plant right</strong></p> <p>To ensure the plants that are stocked are not dangerous to the environment, every Bunnings store has a Greenlife Buyer.</p> <p>National Greenlife Buyer David Hardie says one of the key selection criteria is suitability for local climate and conditions.</p> <p>“Our team also works closely with regulators to ensure we are always stocking the right plants,” he said.</p> <p>“Bunnings is committed to not selling environmental weeds that may have a negative impact on the natural environment.”</p> <p>David adds there are now more non- or less-invasive plant cultivars than in the past and recommends the state and territory plant guide at,<span> </span><a rel="noopener" href="http://www.growmeinstead.com.au/" target="_blank">Grow Me Instead</a>.</p> <p>To control weeds, there is a wide range of herbicides and weedmats available instore. Mulching is a good way to prevent them occurring in the first place, as is cutting spent flowerheads from plants.</p> <p><strong>Disposal methods</strong></p> <p>Once a plant becomes a concern, it needs to be eradicated completely by preventing seeding and reproduction.</p> <p>“But the real problem with weeds spreading and propagating isn’t the birds, it is humans incorrectly disposing of garden waste,” says John.</p> <p>“Many people dump waste in the bush or recycle clippings as mulch thinking they’re being green, but it’s really just spreading weeds further.</p> <p>“The correct disposal method for a large amount of material is using an enclosed system like a skip bin, or taking the waste to the tip, making sure that it is tied down securely in a trailer.</p> <p>“Otherwise, use the green bin and dispose of clippings, weeds and other waste material through your normal rubbish removal service.”</p> <p>John also gives the big thumbs down to the backyard burn-off.</p> <p>“It is illegal in many parts of Australia, especially in summer, and the heat from a burn-off opens seeds so they can germinate. Weed residue can also be carried in the smoke.”</p> <p>Weeds are also a major problem in waterways, as they damage and pollute delicate aqua ecosystems.</p> <p><strong>Water invaders</strong></p> <p>“Athel pine is a shade tree which people use in arid lands,” says John.</p> <p>“It becomes weedy and, like the water hyacinth, which was once an attractive pond plant with its blue flowers, it invades major watercourses.</p> <p>“They are presently trying to control 600km of it in the Finke River, which is the largest dry river in the world, running from above Alice Springs to below the South Australian border.</p> <p>“These trees are often found in recreation areas, caravan parks and the banks of rivers,” says John.</p> <p>Many of the 100 willow tree varieties pose a double threat as they grow on both land and water.</p> <p>“Willows have a very short seed life, from two to six weeks, and this very brief propagation period means they can cross-pollinate and produce seed rapidly, so they’re now threatening our waterways.”</p> <p><strong>Growth season</strong></p> <p>The vigour of a weed’s growth depends on which time of year the rainfall occurs.</p> <p>For most of southern Australia, this would be in spring and for the tropical north in summer.</p> <p>Regardless of location, rainfall and season, once any type of weed takes hold, it’s hard work getting rid of it.</p> <p>“If you are going to successfully keep weeds down, you can never take the pressure off, as it requires dedicated persistence to keep them under control,” says John.</p> <p><strong>Pulling weeds</strong></p> <p>The Sydney Weeds Committee offers advice on how to weed manually.</p> <p>Always wear gloves and use a hand trowel to remove the entire root so the plant can’t resprout from any remaining root system.</p> <p><strong>RAKE</strong><span> </span>background mulch.</p> <p><strong>INSERT</strong><span> </span>the trowel and carefully loosen the soil around the roots.</p> <p><strong>PULL</strong><span> </span>the plant free, grasping it by the stems or the leaves while freeing the roots with the trowel.</p> <p><strong>REMOVE</strong><span> </span>the plant and shake off the excess soil.</p> <p><strong>REPLACE</strong><span> </span>the disturbed soil and any ground mulch.</p> <p>Place the entire plant or any part capable of reproducing, such as tubers, rhizomes, berries, seeds or other propagules in a bag and remove from the site.</p> <p>Other debris material can be mulched on site.</p> <em>Written by Handyman. Republished with permission of <a href="https://www.handyman.net.au/how-know-what-weeds-pull-and-what-leave-garden">Handyman</a>.</em></div>

Lifestyle

Placeholder Content Image

7 plants to grow and spice up your home cooking

<div class="field field-name-body field-type-text-with-summary field-label-hidden"> <div class="field-items"> <div class="field-item even"> <p>For lovers of spicy Asian food, a stir-fry, laksas and curries will be favourites on the menu.</p> <p>And certain herbs and spices are necessary ingredients for these cuisines.</p> <p>Curry leaves, lemongrass, Kaffir lime leaves, chilli, galangal, ginger and turmeric are among the essentials, with different combinations imparting a fabulous zing to fish, meat and vegetable dishes.</p> <p>Add these plants to the vegie patch so you have them on hand and can enjoy them fresh and at their best.</p> <p>Even if you have a courtyard or a balcony, you can still grow them, as most can be planted in containers.</p> <p>Many great intense flavours come from underground from rhizomes, such as galangal, ginger and turmeric, adding spice to many dishes.</p> <p>Belonging to the ginger family (Zingiberaceae), they all feature elegant tropical foliage that looks great planted among ornamentals.</p> </div> </div> </div> <div class="view view-content-slider view-id-content_slider view-display-id-content_slider_block view-dom-id-b5c8b242cf08c50b909aa17f4a0eb74b"> <div class="view-content"> <div class="views-row views-row-1 views-row-odd views-row-first"> <div class="views-field views-field-field-slides"> <div class="field-content"> <div class="field-collection-view clearfix view-mode-full field-collection-view-final"> <div class="entity entity-field-collection-item field-collection-item-field-slides clearfix"> <div class="content"> <div class="field field-name-field-slide-title field-type-text field-label-hidden"> <div class="field-items"> <div class="field field-name-field-slide-title field-type-text field-label-hidden"> <div class="field-items"> <div class="field-item even"><strong>1. Galangal</strong></div> </div> </div> <div class="field field-name-field-slide-image field-type-image field-label-hidden"> <div class="field-items"> <p>Commonly called Thai ginger, galangal (Alpinia galanga) tastes like a cross between pepper and ginger.</p> <p>A good understorey plant among other tropical foliage, it can grow up to 2m high, depending on the variety.</p> <p>GROW: Choose a semi-shaded or shaded spot in rich and moist but free-draining soil. Feed in spring and summer with Yates Dynamic Lifter and water regularly. A light frost won’t kill the plant but will damage the leaves.</p> <p>In spring, plant small rhizomes with at least two eyes 50-100mm deep.</p> <p><strong>HARVEST</strong>: Use about 10 months after planting. Dig carefully around the base and remove rhizomes as needed if you don’t want to disturb the clump.</p> <p><strong>USE</strong>: Flavour Asian soups and curries with fresh galangal. The young shoots are edible and the leaves impart a slight perfume when used to wrap steamed fish. Teams well with lemongrass.</p> <div class="field field-name-field-slide-title field-type-text field-label-hidden"> <div class="field-items"> <div class="field-item even"><strong>2. Ginger</strong></div> <div class="field-item even"> <p>The pungent rhizome of ginger (Zingiber officinale) is an important spice in Japanese and Chinese cuisine. It has elegant, lance-shaped leaves and grows to about 1.2m high.</p> <p><strong>GROW</strong>: It likes a warm, frost-free climate and a semi-shaded position in rich and moist but well-drained soil.</p> <p>Plant fresh store-bought rhizomes. Cut the rhizome so each piece has at least two eyes, let the ends dry, then plant. Feed in spring and summer with Yates Dynamic Lifter and water regularly.</p> <p><strong>HARVEST</strong>: Use about 9-10 months after planting. Dig up the whole clump or dig carefully around the clump and remove rhizomes when needed. Replant some rhizomes to ensure<br />a continuous supply.</p> <p><strong>USE</strong>: Add fresh to Asian soups, seafood and meat curries.</p> <div class="field field-name-field-slide-title field-type-text field-label-hidden"> <div class="field-items"> <div class="field-item even"><strong>3. Turmeric</strong></div> </div> </div> <div class="field field-name-field-slide-image field-type-image field-label-hidden"> <div class="field-items"> <p>The name turmeric (Curcuma domestica) is thought to originate from the Latin words terra merita, meaning ‘merit of the earth’.</p> <p>It’s popular for its healing properties and is delicious in curries.</p> <p>With its tropical-looking foliage and white flower spikes, turmeric looks good planted with other foliage plants, in vegetable beds or large pots.</p> <p><strong>GROW</strong>: Give turmeric a lightly shaded or sunny frost-free position in moist but well-drained soil that is enriched with compost.</p> <p>In spring, plant small rhizomes with at least two eyes 50-70mm deep. Feed with Yates Dynamic Lifter in late spring and summer and water regularly.</p> <p><strong>HARVEST</strong>: As the leaves start to yellow and die back in late autumn, harvest the rhizomes. Dig up the whole plant or carefully dig around the clump and remove the rhizomes as needed.</p> <p>: Grate or chop fresh rhizomes and add to dishes, or dry and use with other spices for curries. Wrap fish in the leaves before barbecuing or steaming.</p> <div class="field field-name-field-slide-title field-type-text field-label-hidden"> <div class="field-items"> <div class="field-item even"><strong>4. Curry leaves</strong></div> </div> </div> <div class="field field-name-field-slide-image field-type-image field-label-hidden"> <div class="field-items"> <p>A curry tree (Murraya koenigii) is a worthwhile investment for lovers of Indian food.</p> <p>The leaves are an essential ingredient of dhal and impart a strong curry-like aroma.</p> <p>A small tree, it grows to about 5m high but can be clipped lower. Its long, slender leaves are dark green on top and a pale green underneath.</p> <p><strong>GROW</strong>: Give a curry tree a sunny position in warm, frost-free regions. Feed in spring with a six-month controlled-release fertiliser.</p> <p>It can be grown in a large pot in frosty areas and put under cover.</p> <p><strong>HARVEST</strong>: Fresh leaves are best, as they lose some flavour when dried.</p> <p><strong>USE</strong>: Curry leaves impart their best flavour if fried in oil when you begin making a curry, and add taste to many Indian dishes.</p> <div class="field field-name-field-slide-title field-type-text field-label-hidden"> <div class="field-items"> <div class="field-item even"><strong>5. Lemongrass</strong></div> </div> </div> <div class="field field-name-field-slide-image field-type-image field-label-hidden"> <div class="field-items"> <p>The young white stem and leaf base of perennial lemongrass (Cymbopogon citratus) is a common ingredient in spicy Asian dishes.</p> <p>If you don’t have room in the kitchen garden, it makes an attractive ornamental plant. But give it space, as it can reach a height and spread of 1.2m.</p> <p>It can be grown in a large pot.</p> <p><strong>GROW</strong>: Position in a sunny spot in well-drained soil in warm, frost-free climates. Feed in spring and summer with a soluble plant food.</p> <p>In cool climates, plant in large pots and protect from frost.</p> <p><strong>HARVEST</strong>: Cut the stalk at ground level from the outside of the clump at any time of the year. Cut stalks can be chopped and frozen.</p> <p><strong>USE</strong>: The soft base of the stalk is used in soups and curries. The green older leaves make a refreshing herbal tea.</p> <div class="field field-name-field-slide-title field-type-text field-label-hidden"> <div class="field-items"> <div class="field-item even"><strong>6. Kaffir lime</strong></div> </div> </div> <div class="field field-name-field-slide-image field-type-image field-label-hidden"> <div class="field-items"> <p>Called the makrut lime in Thailand, the Kaffir lime (Citrus hystrix) is an important ingredient in South-East Asian cooking. It grows to 1.5m high, but if the leaves are constantly being picked for cooking, the plant will usually remain small.</p> <p>The strong taste of the leaves is more popular than the fruit. The fruit is knobbly, and while the flesh is not eaten, the zest is used in cooking.</p> <p><strong>GROW</strong>: Give it a sunny position in well-drained soil. In spring, summer and autumn, feed with a three-month controlled-release fertiliser.</p> <p>In cool climates, grow in a pot and place under cover in the sun in winter.</p> <p><strong>HARVEST</strong>: Pick leaves as needed. The leaves can also be frozen whole.</p> <p><strong>USE</strong>: Kaffir lime leaves are used in green curries, fish and chicken dishes, laksa and soups.</p> <div class="field field-name-field-slide-title field-type-text field-label-hidden"> <div class="field-items"> <div class="field-item even"><strong>7. Chilli</strong></div> </div> </div> <div class="field field-name-field-slide-image field-type-image field-label-hidden"> <div class="field-items"> <p>The chilli (Capsicum annuum), an essential ingredient in many dishes, has been a popular spice for centuries.</p> <p>The fruit follows star-shaped white flowers and comes in many different shapes and sizes. Depending on the variety, chillies ripen from green to shades of red, orange, yellow, brown or purple. They look great in pots.</p> <p><strong>GROW</strong> Give chillies a sunny spot in rich, well-drained soil. Sow seeds or plant seedlings in spring and feed when flowers appear with Yates Dynamic Lifter Plus Fruit Food.</p> <p>Water regularly.</p> <p><strong>HARVEST</strong>: Pick chillies fresh, dry the excess or freeze them whole for later.</p> <p>Always wear gloves or scrub your hands thoroughly after handling chillies, as they can burn your skin. Also avoid rubbing your eyes or any other sensitive areas.</p> <p><strong>USE</strong>: Add zing to scrambled eggs and omelettes with a sprinkling of fresh chilli. Use in Asian dishes, stir-fries, laksa and Indian dishes. </p> </div> </div> </div> </div> </div> </div> </div> </div> </div> </div> </div> </div> </div> </div> </div> </div> </div> </div> </div> </div> </div> </div> </div> </div> </div> <p><em>Written by Handyman Magazine. Republished with permission of <a href="http://www.handyman.net.au/7-plants-grow-and-spice-your-home-cooking">Handyman</a>.</em></p>

Lifestyle

Placeholder Content Image

10 must-read insider tips to save you money on gardening

<div class="field field-name-field-intro field-type-text-long field-label-hidden"> <div class="field-items"> <div class="field-item even"> <p>Whether you buy materials from a farmer’s market, local farmers or chain hardware stores, here’s everything you need to know to get your garden growing on a budget.</p> </div> </div> </div> <p><strong>1. Grow what you eat</strong></p> <p>While this may seem like common sense, it’s easy to get carried away when buying seeds and plants for your garden. Realistically, if you don’t eat a certain vegetable or herb now (kohlrabi and purslane, we’re looking at you), you probably won’t eat it even if you grow it. Save yourself time and money by only buying seeds and plants that you know you and your family will eat. </p> <p><strong>2. Buy seeds early in the year</strong></p> <div class="views-field views-field-field-slides"> <div class="field-content"> <div class="field-collection-view clearfix view-mode-full field-collection-view-final"> <div class="entity entity-field-collection-item field-collection-item-field-slides clearfix"> <div class="content"> <div class="field field-name-field-slide-content field-type-text-long field-label-hidden"> <div class="field-items"> <div class="field-item even"> <p>According to Celeste Longacre, gardening expert and author of Celeste’s Garden Delights, you’ll find the biggest selection of seeds and the best deals in spring. “Many catalogues offer discounts if you buy the seeds before a certain date,” Longacre says. “Companies can also run out of specific varieties so you’ll want to get your order right in.” But you don’t need to plant seeds for every vegetable you intend to eat in the coming months. </p> <p><strong>3. Buy gardening equipment in autumn</strong></p> <div class="views-field views-field-field-slides"> <div class="field-content"> <div class="field-collection-view clearfix view-mode-full field-collection-view-final"> <div class="entity entity-field-collection-item field-collection-item-field-slides clearfix"> <div class="content"> <div class="field field-name-field-slide-content field-type-text-long field-label-hidden"> <div class="field-items"> <div class="field-item even"> <p>Most stores try to clear out their gardening supplies in autumn. You’ll find gardening equipment – like shovels, spades, rakes and buckets – at heavily discounted prices that you can use for next year’s garden. Another great idea is to source good quality second-hand items.</p> <p><strong>4. Go in on seeds with your friends</strong></p> <div class="views-field views-field-field-slides"> <div class="field-content"> <div class="field-collection-view clearfix view-mode-full field-collection-view-final"> <div class="entity entity-field-collection-item field-collection-item-field-slides clearfix"> <div class="content"> <div class="field field-name-field-slide-content field-type-text-long field-label-hidden"> <div class="field-items"> <div class="field-item even"> <p>It may seem counterintuitive, but the more you spend, the more you save, thanks to lower prices for higher volume. “Many companies offer deals if you spend a certain amount of money,” says Longacre. “If you get together with friends on your order, you can save.” If agreeing on seeds is a challenge in your friend circle, consider other uses for your yield. </p> <p><strong>5. Plant crops thicker than they actually grow</strong></p> <div class="views-field views-field-field-slides"> <div class="field-content"> <div class="field-collection-view clearfix view-mode-full field-collection-view-final"> <div class="entity entity-field-collection-item field-collection-item-field-slides clearfix"> <div class="content"> <div class="field field-name-field-slide-content field-type-text-long field-label-hidden"> <div class="field-items"> <div class="field-item even"> <p>You can plant crops like beets, carrots, onions, lettuce, basil and rocket closer together than traditionally prescribed, according Longacre. For example, instead of planting seeds 25mm apart, plant them 13mm apart. This way you can thin them out and eat the thinnings while the crop continues growing. </p> <p><strong>6. Hit up a local farm's harvest sale</strong></p> <div class="views-field views-field-field-slides"> <div class="field-content"> <div class="field-collection-view clearfix view-mode-full field-collection-view-final"> <div class="entity entity-field-collection-item field-collection-item-field-slides clearfix"> <div class="content"> <div class="field field-name-field-slide-content field-type-text-long field-label-hidden"> <div class="field-items"> <div class="field-item even"> <p>The harvest sale is basically the equivalent of a half-yearly or anniversary sale, so you can expect to find amazing deals. Harvest sales usually happen between late March and early May, with the majority being held in April. The earlier in the harvest season you go, the more options you’ll have when it comes to crops, but if you wait longer into May, you’re more likely to nab lower prices, as farmers are trying to unload crops for winter.</p> <p><strong>7. Invest in quality equipment</strong></p> <div class="views-field views-field-field-slides"> <div class="field-content"> <div class="field-collection-view clearfix view-mode-full field-collection-view-final"> <div class="entity entity-field-collection-item field-collection-item-field-slides clearfix"> <div class="content"> <div class="field field-name-field-slide-content field-type-text-long field-label-hidden"> <div class="field-items"> <div class="field-item even"> <p>Spending a little more on quality equipment will be worth it in the long run. Not only will you avoid having to re-buy the same gear each year, but you’re also be less likely to deal with stuff breaking mid-season. Equipment worth spending a little extra on: weeders, shears and pitchforks. But no need to buy fancy or expensive pots and planters. Regular, plastic ones will do.</p> <p><strong>8. Tend to your garden regularly</strong></p> <div class="views-field views-field-field-slides"> <div class="field-content"> <div class="field-collection-view clearfix view-mode-full field-collection-view-final"> <div class="entity entity-field-collection-item field-collection-item-field-slides clearfix"> <div class="content"> <div class="field field-name-field-slide-content field-type-text-long field-label-hidden"> <div class="field-items"> <div class="field-item even"> <p>There will be days when crawling on your hands and knees through the dirt doesn’t sound all too appealing, but doing just that is necessary in order to keep your garden healthy. If you get behind on watering, your plants will die, and you’ll have to spend more on new seeds. If you don’t treat a bug invasion right away, it’ll only get worse and cause more damage, both to your plants and your pockets. “The hardest part of gardening is that things need to be done when they need to be done, not when you feel like doing it,” says Longacre. </p> <p><strong>9. Ask about inventory</strong></p> <div class="views-field views-field-field-slides"> <div class="field-content"> <div class="field-collection-view clearfix view-mode-full field-collection-view-final"> <div class="entity entity-field-collection-item field-collection-item-field-slides clearfix"> <div class="content"> <div class="field field-name-field-slide-content field-type-text-long field-label-hidden"> <div class="field-items"> <div class="field-item even"> <p>A lot of stores offer discounted prices for products that they no longer sell, but still have in back stock. Just make sure you ask why they’ve pulled the product before buying because you don’t want to end up with a mower that doesn’t run or seeds that won’t grow in your climate. “Go to their websites and look for discontinued or clearance items,” advises Longacre.</p> <p><strong>10. Plant at the right time</strong></p> <div class="views-field views-field-field-slides"> <div class="field-content"> <div class="field-collection-view clearfix view-mode-full field-collection-view-final"> <div class="entity entity-field-collection-item field-collection-item-field-slides clearfix"> <div class="content"> <div class="field field-name-field-slide-content field-type-text-long field-label-hidden"> <div class="field-items"> <div class="field-item even"> <p>If you plant your crops too early, they will die. And if you pick your crops too late, they will also die. Timing is everything when it comes to planting your garden. You simply need to choose the right produce for the season and do a bit of research on the climate in your area before selecting when to plant your seeds. </p> <p><em>Source:<span> </span><a rel="noopener" href="https://www.rd.com/home/gardening/gardening-tips-to-save-money/" target="_blank">RD.com</a></em></p> </div> </div> </div> </div> </div> </div> </div> </div> </div> </div> </div> </div> </div> </div> </div> </div> </div> </div> </div> </div> </div> </div> </div> </div> </div> </div> </div> </div> </div> </div> </div> </div> </div> </div> </div> </div> </div> </div> </div> </div> </div> </div> </div> </div> </div> </div> </div> </div> </div> </div> </div> </div> </div> </div> </div> </div> </div> </div> </div> </div> </div> </div> </div> </div> </div> </div> </div> </div> </div> </div> </div> </div>

Lifestyle

Placeholder Content Image

How to start a vegetable garden

<p><span style="font-weight: 400;">Growing your own vegetables can save you money and give you a huge amount of satisfaction. Ready to get a green thumb?</span></p> 
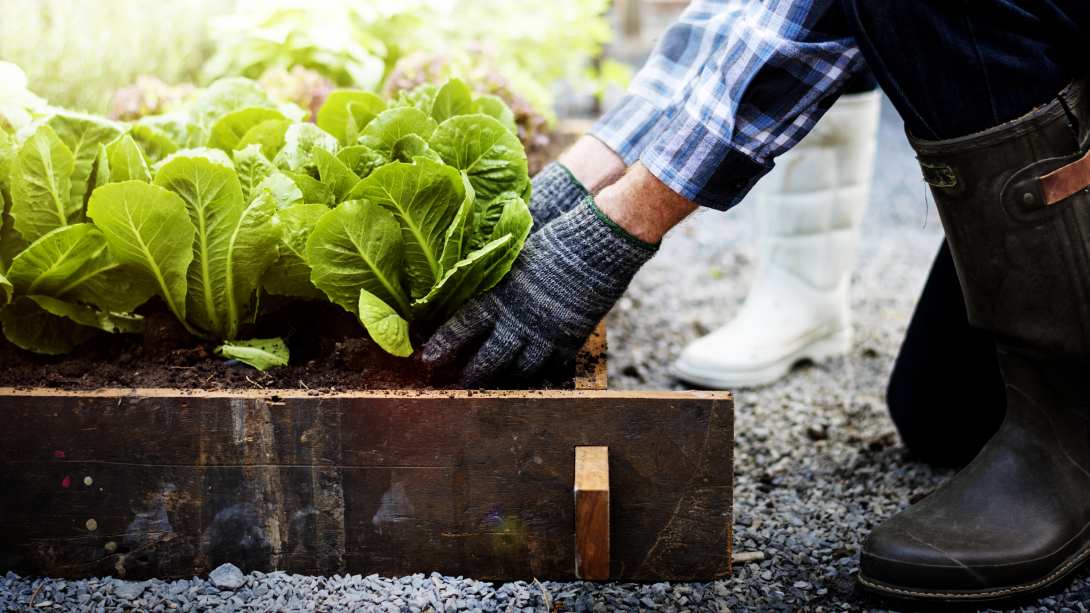
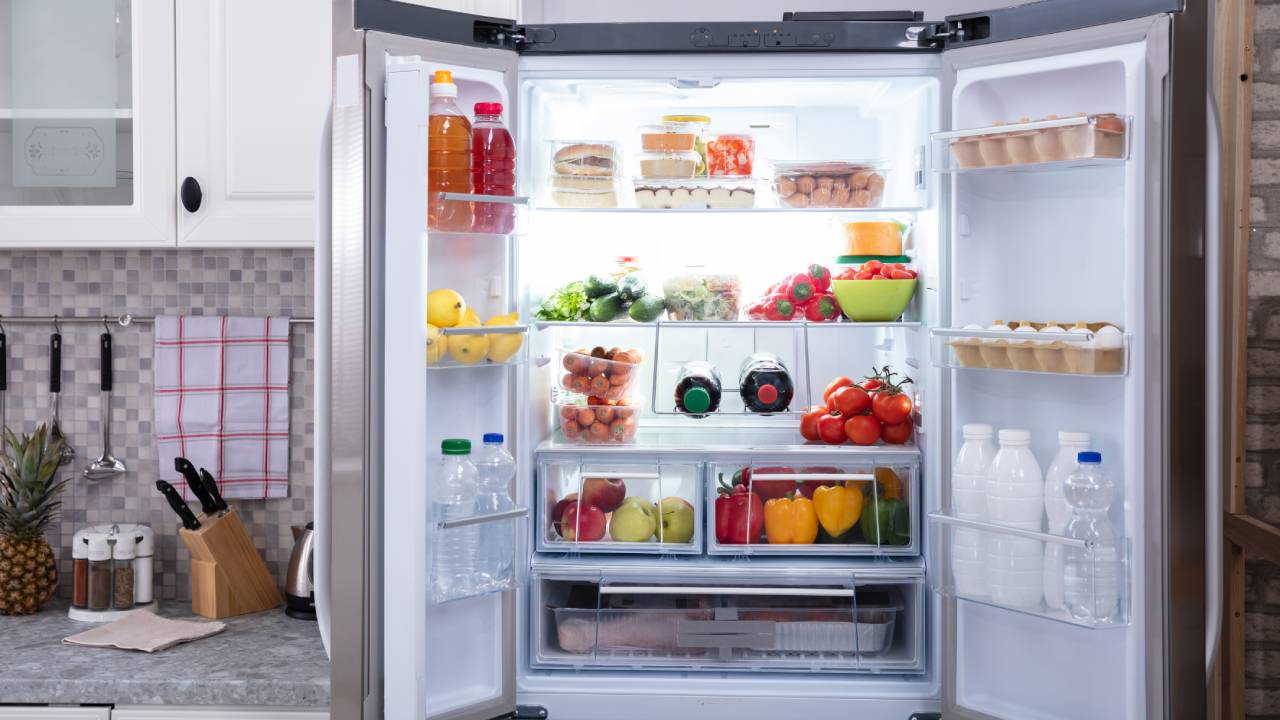
<p><span style="font-weight: 400;">Your own homegrown vegetables taste much better and are fresher than any that you buy in the shops. Fruiting vegetables, like beans, tomatoes, capsicum and sweet corn, have the best flavour if they’re eaten as quickly as possible after harvest; leafy vegetables, such as lettuce, lose water and rapidly become limp, and all vegetables are more nutritious if they are consumed when as fresh as possible. </span></p> 
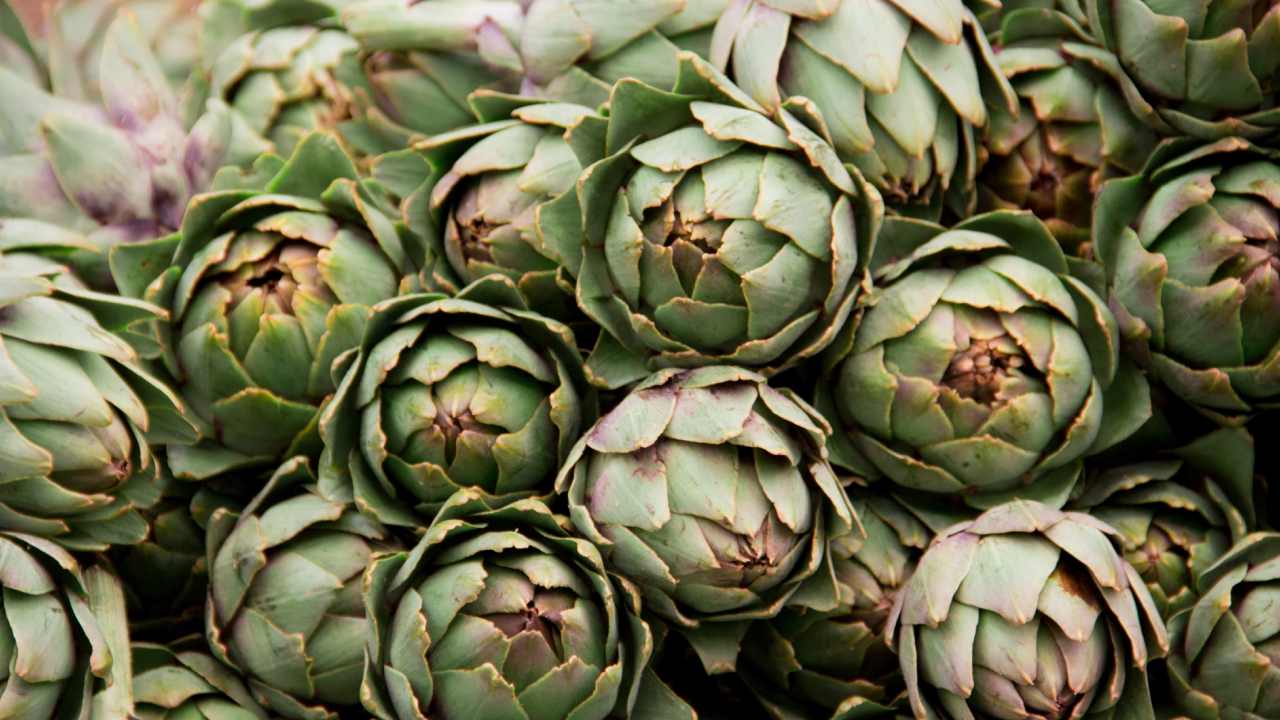
<p><span style="font-weight: 400;">Growing your own can save a considerable amount on food costs and will also give you a wider choice of vegetables. Unusual vegetables are often difficult to buy in shops, but are easily grown in the home garden. Lots of vegetables are ornamental so can be grown for their good looks as well as their produce.  </span></p> <p><strong>WHEN TO GROW VEGGIES</strong></p> <p><span style="font-weight: 400;">Vegetables can be loosely grouped according to their growing season.</span></p> <p><span style="font-weight: 400;"><strong>Cool Season Vegetables:</strong> Grow best when temperatures are between 10-20 degrees C or even lower. They include: broad beans, broccoli, brussels sprouts, cauliflower, onions, peas, spinach and turnips.</span></p> <p><span style="font-weight: 400;"><strong>Intermediate Season Vegetables:</strong> These are best between temperatures of 15-25 degrees. They include: beetroot, carrot, parsnip, celery, leek, lettuce, radish, silver beet.</span></p> <p><span style="font-weight: 400;"><strong>Warm Season vegetables:</strong> Are grown best when temperatures are above 20 degrees celsius. They include: Beans, capsicum, eggplant, potato, sweet corn, sweet potato, tomato and cucurbits (including cucumbers, zucchini, pumpkins etc.) </span></p> <p><strong>VEGETABLE CULTIVATION</strong></p> <p><span style="font-weight: 400;"><strong>Position:</strong> Vegetables must have sun! Try to select a growing area that is sunny for most of the day, is sheltered, and is close to a source of water. </span></p> 
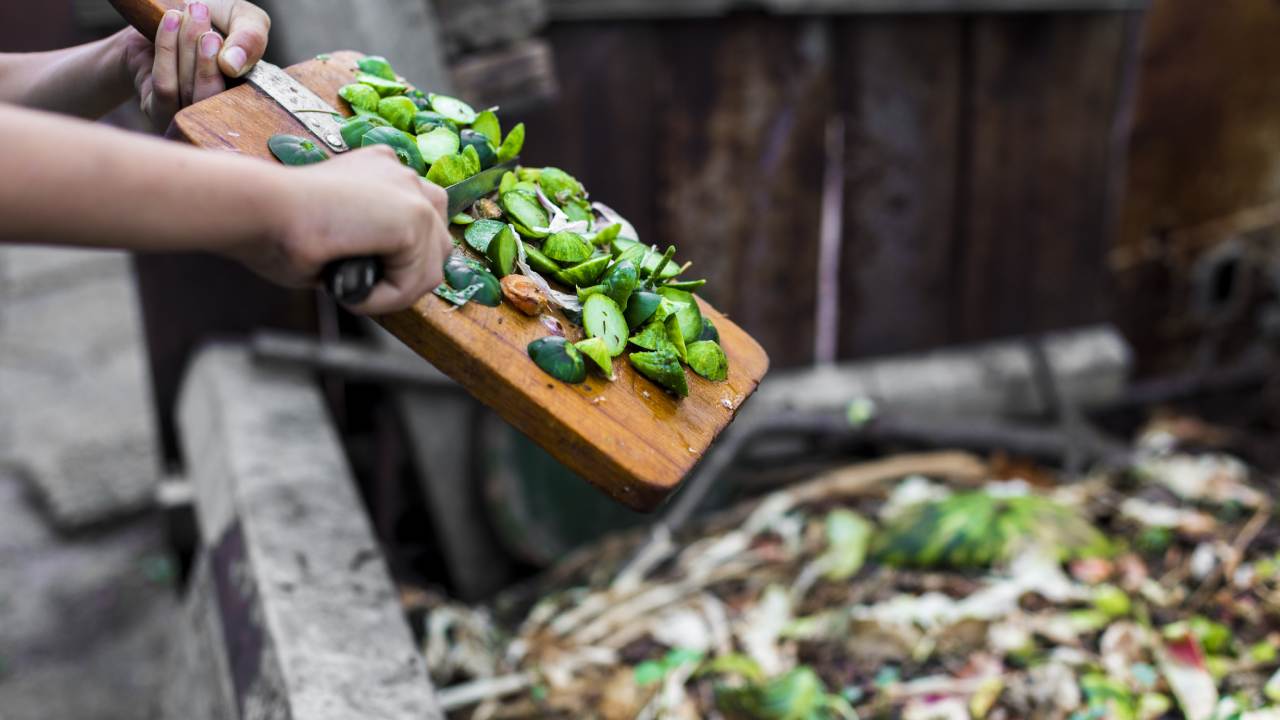
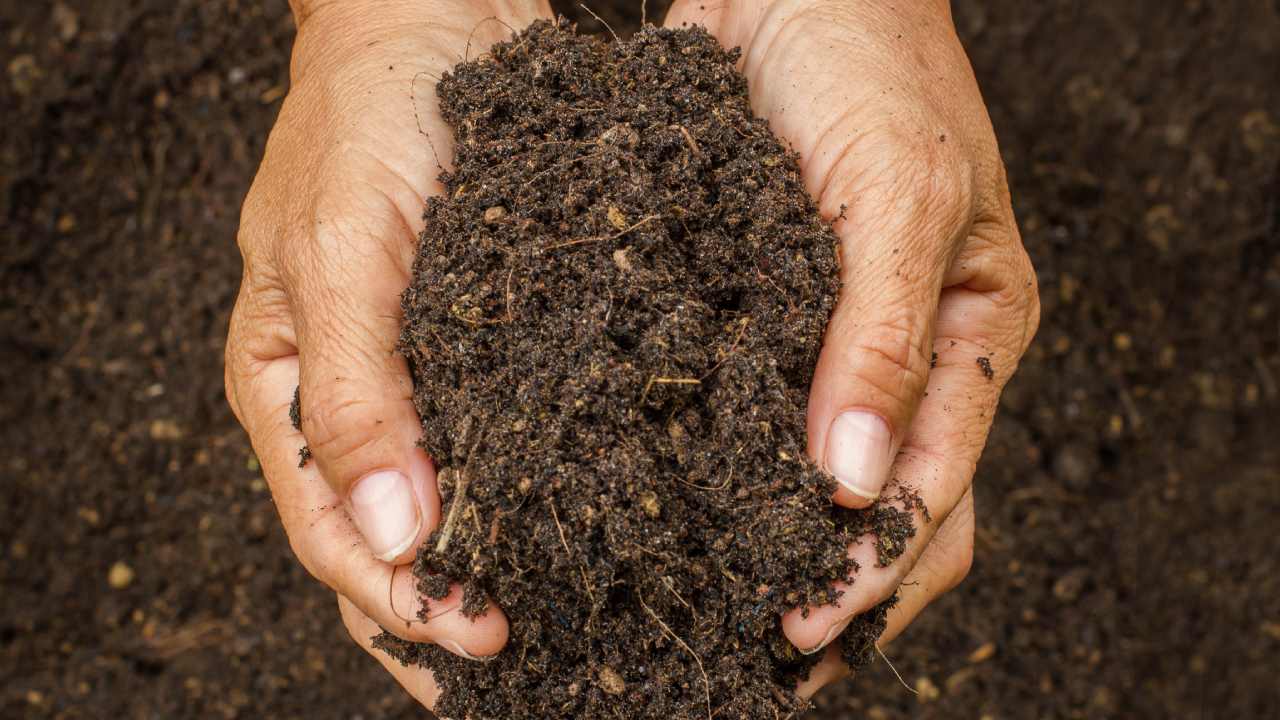
<p><span style="font-weight: 400;"><strong>Soil: S</strong>oil is often the easiest thing to adjust to your growing needs. In fact, strictly speaking, soil is not absolutely necessary. Vegetables can be grown in potting mix or in a hydroponic set up, but the most common medium is still good garden soil. Soil must have good drainage and a good structure. Regular incorporation of old organic matter (such as compost) will keep the soil functioning well. </span></p> <p><span style="font-weight: 400;"><strong>Nutrients</strong>: Vegetables, more than most other plants, need to be supplied with adequate nutrients.</span></p> <p><span style="font-weight: 400;"><strong>Mineral fertilisers:</strong> are reliable sources of good quantities of nutrients. Mixes with a balanced NPK ratio are suited to a wide range of crops. Balanced, all-purpose fertilisers, such as Thrive All Purpose, can be mixed into the soil before planting. Soluble fertilisers, such as Thrive, can be applied in liquid form to plants during their early stages of growth. Additional dressings of Sulphate of Potash and Superphosphate may be necessary, especially for fruiting and root crops.</span></p> <p><span style="font-weight: 400;"><strong>Organic Fertilisers:</strong> are derived from once-living material. They’re excellent for improving soil, but their nutrient levels can be very variable. In recent years, however, increased interest in these products has led to many improvements, with fertilisers such as Dynamic Lifter organic pellets now having guaranteed nutrient levels. </span></p> <p><span style="font-weight: 400;"><strong>pH:</strong> pH is the level of acidity or alkalinity in the soil. Most vegetables produce best results if grown at a soil pH level of 6.0 to 7.0. In some areas this may mean adding lime before planting. Checking the pH level of the soil is recommended. </span></p> 
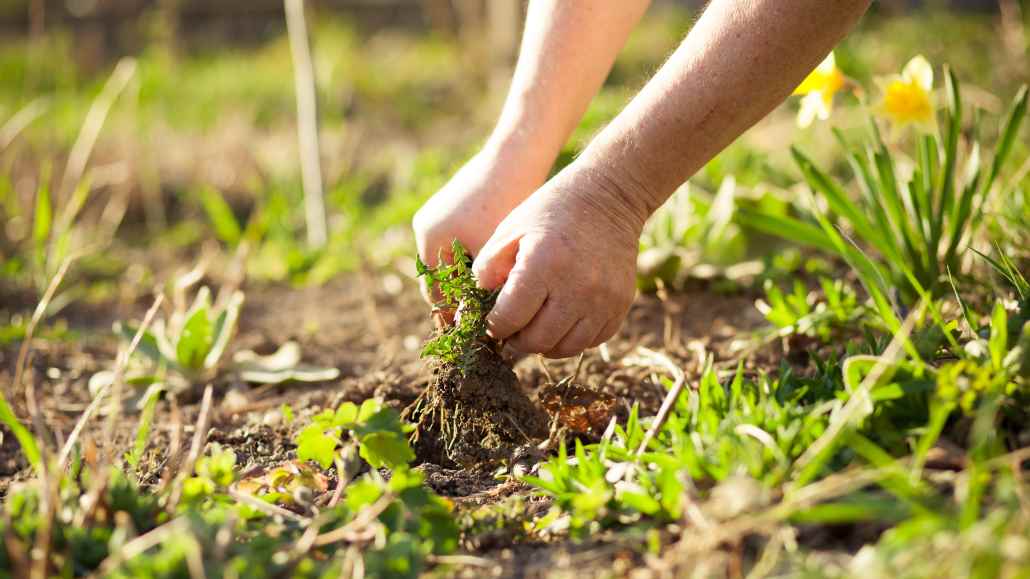
<p><span style="font-weight: 400;"><strong>Mulching:</strong> Mulching over plants’ root systems, preferably with an organic mulch, will retain moisture, suppress weeds, reduce temperature fluctuations, and prevent soil crusting. </span></p> <p><span style="font-weight: 400;"><strong>Watering:</strong> Water thoroughly so that the entire root system of the plant is moistened. Thorough waterings are more effective than light sprinklings. Don’t allow plants to reach wilting point but, conversely, don’t flood them as this washes away nutrients and may cause drainage problems. </span></p> <p><span style="font-weight: 400;"><strong>Crop rotation:</strong> It’s important to avoid growing successive crops of the same type of vegetable in the same spot in the garden. This practice, which is called crop rotation, helps prevent build up of soil diseases. Seasonal crop changes often lead to natural crop rotation. </span></p> <p><strong>FAVOURITE VEGGIES</strong></p> <p><span style="font-weight: 400;"><strong>Beans –</strong> Available in dwarf or climbing forms, beans produce pods that are sliced or eaten whole. They must be grown during the warm season. Origin: Tropical America. Nutrition Value: Vitamin C, Vitamin A (beta carotene), iron, fibre and some protein.</span></p> <p><span style="font-weight: 400;"><strong>Beetroot – T</strong>he deep crimson swollen root of beetroot is cooked in stews and soups or cooled for salads. Its leaves can also be used as a vegetable. Origin: Southern Europe. Nutrition Value: Excellent source of folate.</span></p> <p><span style="font-weight: 400;"><strong>Brassicas</strong> (cabbages, cauliflower, broccoli, Brussels sprouts) – All grow better when temperatures are not too hot or too cold although new varieties are more heat tolerant. The introduction of Chinese cabbages and other oriental brassicas has encouraged new culinary uses for this group of vegies. Origin: Europe and Asia. Nutrition Value: Vitamin A, Vitamin C, mineral salts, fibre, protein.</span></p> <p><span style="font-weight: 400;"><strong>Broad Beans –</strong> Grow on upright bushes during the cooler time of year. The whole pod can be eaten when young or (more commonly) the seeds are removed and cooked. Origin: Prehistoric Europe and ancient Egypt Nutrition Value: High in carbohydrates, fibre, minerals, Vitamin A and Vitamin C.</span></p> <p><span style="font-weight: 400;"><strong>Vegetable -</strong>garden -carrots -potatoes -wyza -com -au</span></p> <p><span style="font-weight: 400;">If you're short of space for growing veggies, try square foot gardening</span></p> <p><span style="font-weight: 400;"><strong>Carrot</strong> – A root vegetable that is traditionally bright orange in colour. Must be grown in well-drained, friable soil that is free of stones, fresh manure or fertiliser. Origin: Europe. Nutrition Value: Potassium, carotene (Vitamin A), Vitamin C and fibre.</span></p> <p><span style="font-weight: 400;"><strong>Cucurbits –</strong> Includes vine plants such as pumpkin, cucumber, zucchini, melons. They must grow during warm season and almost all have separate male and female flowers. Only the females produce fruit. Origin: Tropical America and the Orient. Nutrition Value: Vitamin C, minerals and fibre.</span></p> <p><span style="font-weight: 400;"><strong>Lettuce –</strong> The most popular salad plant in the world, lettuce is grown for its crisp green leaves. Butterhead lettuce has soft, buttery leaves; crisphead or iceberg have firm, solid hearts; cos has upright, loose leaves. Origin: Mediterranean. Nutrition Value: Carotene (Vitamin A), Vitamin C, fibre.</span></p> <p><span style="font-weight: 400;"><strong>Onions –</strong> Onions are bulbs with a pungent flavour. The bulb develops in response to day length and correct sowing times are critical for onions. Origin: Central and Western Asia. Nutrition Value: Vitamin C, calcium.</span></p> <p><span style="font-weight: 400;"><strong>Peas –</strong> The pea is a legume that is grown for its pods or for the seeds they contain. For many centuries peas were eaten only in their dried form but the fresh pea has a sweet, pleasant flavour. Available in dwarf or climbing forms. Origin: Asia and North Africa.Nutrition Value: Protein, fibre, Vitamin A, Vitamin C, mineral salts. One of the most nutritious vegetables.</span></p> <p><span style="font-weight: 400;">The underground tuber of a warm season plant that is now one of the world’s staple foods. Easily grown in the home garden but needs plenty of room. Origin: South America. Nutrition Value: Protein, Vitamin C, carbohydrate and fibre.</span></p> <p><span style="font-weight: 400;"><strong>Sweet Corn</strong> – A warm season cereal that is grown for its sweetly flavoured seeds, sweet corn grows on a tall plant. The seeds must be pollinated by pollen falling from the tassel at the top of the plant. Origin: South America. Nutrition Value: Vitamin C, fibre, minerals and protein.</span></p> <p><span style="font-weight: 400;"><strong>Tomatoes</strong> – A warm season fruiting vegetable that is popular both in salads and cooked dishes. Fresh tomatoes are best eaten at room temperature. Origin: South and Central America. Nutrition Value: Vitamin A, Vitamin C, fibre and protein.</span></p> <p><strong>MATT’S TOP 7 TIPS</strong></p> <p><span style="font-weight: 400;">Sydney based Landscape Gardener Matt Paton says the secret to growing a great home veggie patch is finding the right location to plant, using a good potting mix and watering regularly. </span></p> <p><strong>1. Choose the best location:</strong> Always plant in a bright and sunny area which is away from any windy spots.This will maximise the growing potential for your vegetables and will help to provide years of fresh vegetables for you and your family.</p> <p><strong>3. When planting in clay:</strong> If you have a clay type soil use a liberal dose of clay breaker or gypson. This powder needs to be worked into the soil with a garden fork (as a guide you should go as deep as the garden fork goes in the soil) for best results. This helps breaks down the clay to release the other vital nutrients in the soil to the plants but must be done several days before planting the seeds.</p> <p><strong>4. Draw up a plan:</strong> Then mark up the spacing with a tape measure and create holes with your finger or a stick to show where you are planning to put the seeds. Then tag the area with whatever is handy such as coloured pegs or if you want the professional look then buy specific plant tags from a nursery.</p> <p><strong>5. Use a good quality potting mix:</strong> Buy this from a nursery and use your garden fork to mix this into the soil. This winning combination gives added nutrients to your growing vegetables and provides a healthy environment for a great crop to grow.</p> <p><strong>6. Space out your vegetables:</strong> Follow the instructions given on the side of seed packets regarding spacing out the vegetables. They will grow better and it really does make a difference to help maximise your seasonable vegetables crop. If they are planted too close together then pests and diseases are likely to become more prevalent in your vegetable garden. </p> <p><span style="font-weight: 400;"><strong>7. Apply a layer of mulch:</strong> This should be about 50-75 mm thick of mulch to the whole area of the vegetable garden (just cover the rows you will be planting and harvesting) as this reduces weeds and provides organic matter to the plants when it breaks down. </span></p> <p><strong>8. Liquid fertilisers give good results:</strong> Consider using a liquid fertiliser as the plants take up the nutrients of the fertiliser quicker than they do with a granular fertiliser. It also saves you time. If you use a granular fertiliser then always water when the soil appears dry and apply the fertiliser before you water.You can use a granular slow release fertiliser such as 'Osmacote' for vegetables.You can also use a liquid fertiliser such as 'Seasol’. This has the added benefit of watering the plants and fertilising them simultaneously.</p> <p><em><span style="font-weight: 400;">Republished with permission of </span><a href="https://www.wyza.com.au/articles/property/how-to-start-a-vegetable-garden.aspx"><span style="font-weight: 400;">Wyza.com.au.</span></a></em></p>

Health

Placeholder Content Image

7 expert tips for selling your property

<p>Selling your house this spring? In this blog, styling expert Justine Stedman shares her top tips and tricks for preparing homes for sale.  Just a few simple tweaks can be the difference between a mediocre result and a record-breaking sale.<br /> <br />Here are Justine’s tips. </p> <p><strong>1. Get the basics right</strong></p> <p>Make sure the property is clean and clutter free. Remove any excess furniture and decorative items like photo frames and trinkets.</p> <p><strong>2. Create aspirational living</strong><span> </span></p> <p>Set the scene and present the lifestyle the property offers its buyers. Introduce style and detail through cushions, throws, accessories and artwork.</p> <div class="rtecenter"><strong>3. Showcase functionality</strong><span> </span></div> <p>Help buyers visualise how the space will function for them or their perspective tenant. The most common error that people make when styling their homes for sale is selecting furniture that does not fit the room properly.</p> <div class="rtecenter"><strong>4. Add perceived value</strong><span> </span></div> <p>Convert unused and awkward areas into usable spaces that add extra value to buyers.</p> <p><strong>5. Manage your first impression</strong><span> </span></p> <p>First impressions count so a fresh coat of paint on the façade can be money well spent. Repair any outside damage such as broken fencing, guttering or outdoor lights and create a pathway.</p> <p><strong>6. Prepare for open homes</strong><span> </span></p> <p>Be organised and prepare in advance for open houses. Ensure the property is spotless on open days with no trace of pets in sight or scent.</p> <p><strong>7. Enlist a property stylist</strong><span> </span></p> <p>Styling a property for sale helps potential buyers to connect emotionally with the property and realise its true functionality and potential.</p> <p><em>This is a guest blog by Justine Wilson, Director and Principal Stylist at <a rel="noopener" href="http://www.vaultinteriors.com.au/" target="_blank">Vault Interiors</a>. </em></p> <p><em>Republished with permission of </em><a href="http://www.handyman.net.au/7-expert-tips-selling-your-property"><em>Handyman</em></a><em>. </em></p>

Lifestyle

Placeholder Content Image

How to grow artichokes

<p><strong>History has not recorded</strong><span> </span>the adventurous gourmet who discovered that the base of the flower scales of the thistle-like globe artichoke – and the base of the flowers – could be eaten. It was a fine discovery, for their delicate yet unmistakable flavour makes artichokes one of the most prized of all garden vegetables. They are not only delicious but also strikingly beautiful, their silvery grey leaves providing a perfect foil for summer flowers. For this reason, they are often grown in herbaceous borders.</p> <h4>Planning the crop</h4> <p>Globe artichoke plants will not always survive severe winters and it is best to grow them in a sheltered, sunny part of the garden in severe-winter areas. Good soil preparation is well repaid. Loosen the soil to a depth of 60 cm and work through plenty of compost and manure. These plants need excellent drainage, and loams or sandy loams are ideal. Or plant in raised beds. They are tolerant of salt sea breezes. They need a chilling period to flower well.</p> <p><strong>How many to grow:</strong><span> </span>It depends on how popular artichokes are in your household – and how much space you have. Plants need to be set 1 m apart, but if space is tight, you can plant singly at the back of a herbaceous or mixed border. Globe artichokes will grow to a height of 1.2-1.5 m.</p> <p><strong>Varieties:</strong><span> </span>Green Globe and Purple Globe are most widely available. Purple Globe is hardier and best in cooler areas. Now gourmet heirloom varieties are also sought. Deep purple Romagna Violet and purple-tinged Romanesco from Italy and Gros Vert de Laon from France are propagated from seed.</p> <h4>Growing tips</h4> <p>Artichokes will grow and flower for about six years; the heads get smaller and tougher after three or four years. Replace a few plants each year so that you always have new plants maturing and some old ones dying down. To start a crop, buy young plants or suckers in spring and plant in soil to the same depth as they were in the nursery bed or pot.</p> <p>Every year, apply a liberal mulch of manure or compost in spring. During dry periods, especially when plants are growing strongly, make sure that they are well watered. The new plants will provide a few heads by late summer, particularly if well fed with manure and potash to encourage flowering. Frost protection is essential in areas with severe winters. Cut the plant back to about 30 cm above ground.</p> <p>Mound soil around the plant, taking care not to cover the crown. Put a good layer of autumn leaves on top and anchor with a double layer of horticultural fleece. In the second and third years, allow each plant to develop only four to six stems. Leave the flower on the main stem – called the king head – as well as a few other flowers at the end of the lateral shoots. Remove any offshoots around the base as this will help to keep the plant productive.</p> <p><strong>Raising new plants:</strong><span> </span>During spring and late autumn in mild climates, select strong shoots about 25 cm high on plants that are at least three years old. Cut vertically alongside each shoot with a spade or sharp knife, keeping part of the rootstock below. In cold areas prone to frost, pot up offshoots in containers, and plant out in their permanent positions as soon as the danger of frost has passed.</p> <h4>Pests and Diseases</h4> <p>Artichokes are generally pest-free, apart from slugs and snails in damp conditions and aphids. Major diseases are verticillium and fusarium wilt.</p> <h4>Harvesting and Storing</h4> <p>Mature plants produce ripe heads in November and December. Pick them, starting with the king head, when the bracts are still tightly wrapped. Use a sharp knife or secateurs to cut off a head with a 12 cm stem, then cut back each stem to about half its original length. The flower heads on the lateral shoots are best picked when about hen’s-egg size. Very small, young heads can be cooked and eaten whole. You can place the stems in lightly sugared water and store in the refrigerator for a few days.</p> <p><strong>At-a-glance timetable</strong></p> <p><strong>Planting:</strong><span> </span>late autumn or spring</p> <p><strong>Mulching:</strong><span> </span>late spring to early summer</p> <p><strong>Harvesting summer:</strong><span> </span>first year to fourth year</p> <p><strong>Removal of offshoots:</strong><span> </span>late autumn or spring, second year onwards</p> <p class="p1"><em>Written by Reader's Digest Editors. This article first appeared in <a href="https://www.readersdigest.com.au/gardening-how-to-grow/how-to-grow-artichokes">Reader’s Digest</a>. </em></p>

Lifestyle

Placeholder Content Image

10 tips on how to help your indoor garden thrive

<p>Plants bring life and colour into the home and require little in the way of maintenance. Follow these simple tips and your plants should flourish.</p> <div class="at-below-post addthis_tool" data-url="https://www.readersdigest.com.au/gardening-tips/how-help-your-indoor-garden-thrive"><strong>1. Position plants carefully</strong></div> <p>Look for the best place in the house for each plant, and don’t be afraid to try different locations until you find the best spot. </p> <p><strong>2. Re-create a forest floor</strong></p> <p>If a room seems too dark to sustain a healthy plant, don’t be fooled. Most indoor plants originate in tropical and subtropical regions, in particular equatorial forests, and they thrive in dim environments and filtered light. The ideal spot is in front of a large window facing east or west, filtered if necessary through a net scrim curtain.</p> <p><strong>3. Sun-lovers face north</strong></p> <p>If you have a plant that thrives on lots of sun, place it on a windowsill facing north or north-east. Check soil moisture levels regularly and inspect the leaves to check they are not being burned. At the slightest sign of withering, move the plant towards the middle of the room.</p> <p><strong>4. Plants for the bathroom</strong></p> <p><span>Ferns and other moisture-loving plants do best in vaporous rooms like bathrooms where they can lap up regular doses of mist.</span></p> <p><strong>5. Water from the bottom</strong></p> <div id="page6" class="slide-show"> <div id="test" class="slide"> <div class="slide-description"> <p>Water poured directly onto the soil may flood, or not reach the pot plant’s roots. Instead, water plants bottom up by standing them in a dish and filling the dish with water. Delicate plants such as fuchsias thrive on this method. For this method to work, all pots should have holes in the bottom through which the water is absorbed.</p> <p><strong>6. Keep away from drafts</strong></p> <div id="page7" class="slide-show"> <div id="test" class="slide"> <div class="slide-description"> <p>If you don’t want your plant to die of heat or cold, avoid placing it in draughty areas or near ducted heat or air-conditioning outlets.</p> <p><strong>7. Do not over water</strong></p> <div id="page8" class="slide-show"> <div id="test" class="slide"> <div class="slide-description"> <p>Water your plants only when the potting mix feels dry to the touch – over watering is often the cause of indoor plant death. Check by pushing your finger into the soil; if it comes out without any trace of soil on it, start watering. Remember that plants may need more frequent watering in summer.</p> <div class="at-below-post addthis_tool" data-url="https://www.readersdigest.com.au/gardening-tips/how-help-your-indoor-garden-thrive"><strong>8. Remember, plants like to be misted</strong></div> <div class="at-below-post addthis_tool" data-url="https://www.readersdigest.com.au/gardening-tips/how-help-your-indoor-garden-thrive"> <div id="page9" class="slide-show"> <div id="test" class="slide"> <div class="slide-description"> <p>Most indoor plants benefit from an occasional misting of water. Make sure the water is at room temperature and use an atomizer or spray bottle. Misting is particularly beneficial if you live in a centrally heated or air-conditioned house as the air can become very dry.</p> <p><strong>9. Apply some fertiliser</strong></p> <p>Feed your plants with small amounts of fertiliser. The fastest and simplest solution is complete liquid fertiliser in the recommended dose, usually every two to four weeks – check the label. </p> <p><strong>10. Use ice cubes</strong></p> <p>An efficient way to water your plants directly at a steady rate is to use ice cubes. Put a couple on top of the pot soil and leave them to melt.</p> <div id="page11" class="slide-show"> <div id="test" class="slide"> <div class="slide-description"> <p class="p1"><em>Written by Brenda Schmerl. This article first appeared in <a rel="noopener" href="https://www.readersdigest.com.au/gardening-tips/how-help-your-indoor-garden-thrive" target="_blank">Reader’s Digest</a>. </em></p> </div> </div> </div> </div> </div> </div> </div> </div> </div> </div> </div> </div> </div> </div> </div> </div>

Lifestyle

Placeholder Content Image

8 foods you don’t need to refrigerate

<p>Do you know which foods don't need to be refrigerated? For many of us, the answer is a matter of what we grew up with or personal preference.</p> <p>But there are some hard and fast rules. </p> <p>Here are some foods you definitely shouldn't put in your fridge.</p> <p><strong>1. Tomatoes</strong></p> <p>Tomatoes are best left on the bench and not in your fridge because they're sensitive to ethylene – a gas that accelerates ripening. Keeping your tomatoes separate from ethylene-producing foods, such as bananas, apples, pears and oranges, will ensure they stay fresh for longer. <br /><br /><a href="https://choice.us4.list-manage.com/track/click?u=270103a13e38b9f6643b82a8e&amp;id=1fe3558b8d&amp;e=7f9260877c">Research</a> also shows that chilling tomatoes below 12°C limits their ability to generate substances that contribute to aroma and taste. In other words, they won't be as nice to eat. <br /><br />"Tomatoes lose flavour when placed in the fridge," says CHOICE's home economist Fiona Mair. "I always keep my tomatoes in my fruit bowl or on the window sill. <br /><br />"I like to buy a mixture of firm and slightly soft tomatoes so I have beautifully ripened tomatoes I can use across the week." </p> <p><strong>2. Coffee</strong></p> <p>Ground or whole-bean coffee should never be kept in the fridge, even if it's in an airtight container. Why? Because coffee works as a deodoriser and absorbs moisture, odours and flavours from the air around it, making your morning cuppa taste less like the nectar of the gods and more like a nasty flavouring of 'fridge'. Ew. <br /><br />Instead, keep your beans in an airtight container in a dark space such as your pantry, away from sunlight, heat, steam and moisture. For the best  flavour and freshness, buy your beans as fresh as possible and use them within 72 hours of roasting. <br /><br />If that's not possible, you can store your coffee beans in the freezer for up to a month, according to the US National Coffee Association. But do so in small portions because, once you've taken your beans out of the freezer, it's best not to put them back in again.</p> <p><strong>3. Uncut root vegetables </strong></p> <p>Root vegetables, such as potatoes, onions, sweet potato and garlic, thrive outside the fridge crisper. The high humidity in fridges can cause root vegetables to rot faster. It's also important that you don't store root vegetables together, as this can affect their flavour. <br /><br />"Keeping these types of food out of the refrigerator is generally to avoid moisture absorption that happens in the refrigerator, as this can cause foods to ferment and reduce the taste and quality," says Mair. "Best to find a cool dry dark spot in your kitchen." <br /><br />According to Aloysa Hourigan, accredited practising dietitian and nutritionist and media manager at <a href="https://choice.us4.list-manage.com/track/click?u=270103a13e38b9f6643b82a8e&amp;id=9db113104f&amp;e=7f9260877c">Nutrition Australia</a>, there are some exceptions to the rule, especially after the vegetables have been cut. <br /><br />"Onions are best stored out of the fridge until they're cut, then need to be covered or placed in a sealed container and kept in the fridge," she says. <br /><br />"Whole pumpkins can be stored out of the fridge for many weeks, but once cut, they need to be stored in the fridge." <br /><br /><br /><strong>4. Coconut oil</strong> <br />"Coconut oil is climate-dependant and will solidify at temperatures lower than 24°C, so it's best to keep it in a cool, dark place like the pantry," says Fiona. <br /><br />But she says as a general guide, nut and seed oils are best kept in the refrigerator, otherwise they're "more likely to oxidise and go rancid quickly." <br /><br />Whether or not you need to put a condiment in the fridge depends entirely on the type of sauce, oil or spread you have, how much preserving salt or sugar they contain, and whether it's been opened. <br /><br />"With bottled sauces, such as soy sauce, sweet chilli sauce, oyster sauce and curry pastes, it's always best to check the label to see if it says 'refrigerate after opening'," says Hourigan. <br /><br /><strong>5. Bread</strong></p> <p>Bread doesn't belong in the fridge – it'll go stale much faster than if you just keep it in the pantry. <br /><br />Instead, keep your bread in an airtight tin, bread box or, for hard-crusted bread, a brown paper bag. Avoid plastic too, as this encourages bread to go mouldy faster. <br /><br />Fresh bread will only last a few days before it naturally goes stale, but you can extend its life span by putting it in the freezer. Doing so slows down the natural process of retrogradation and recrystallisation, and stops it going stale.</p> <p><strong>6. Honey and peanut butter</strong></p> <p>Honey and nut spreads are all unique, so all need different types of storage. This is why it's important to always check the label for advice.</p> <p>Honey is unique - one of the few foods in the world that never spoils thanks to its one-of-a-kind chemical make-up. The reason honey doesn't go bad is because bacteria can't grow in it, so it's happy to sit at room temperature in your pantry, where it stays soft and easy to spread. When refrigerated, honey crystallises, but is still perfectly edible.</p> <p>Honey's durability is legendary. When archaeologists opened ancient Egyptian tombs, they found jars of honey from the days of the Pharaohs that were still good to eat.<br />As for peanut butter, it's fine in the pantry for three months or so after opening. But to extend its shelf life and avoid oil separation, you can also keep it in the fridge, though this will harden it and could make it a bit more difficult to spread.</p> <p><strong>7. Basil and parsley </strong></p> <p>Some herbs such as coriander and mint are best kept in the refrigerator crisper, wrapped loosely in absorbent paper and put in a sealed container. <br /><br />But basil and parsley will turn a nasty shade of yuk if you keep them in the crisper. <br /><br />"These herbs seem to do better out of the fridge," says Hourigan. "The dry air in the refrigerator causes the leaves to wilt easily." <br /><br />To store your basil and parsley, Mair says, cut the bottom of the stems, place them in a jar with a small amount of water, then leave the jar in a cool place. "You'll just need to change the water and cut the bottom of the stems every couple of days," she says. <br /><br /><strong>8. Warm leftovers</strong></p> <p>Putting hot food in the fridge can wreak havoc on its internal temperature, which may affect other food in the fridge as well. <br /><br />So, for the sake of freshness, leave your warm leftovers to fall to room temperature first.  </p> <p><em>Republished with permission of <a rel="noopener" href="https://www.choice.com.au/home-and-living/kitchen/fridges/articles/eight-foods-you-do-not-need-to-refrigerate" target="_blank">CHOICE</a>.</em></p>

Finance

Placeholder Content Image

How to build a picket fence

<p>A picket fence is ideal for Federation homes and consists of a number of evenly spaced pickets attached to two horizontal rails supported by posts spaced about 2m apart.</p> <p>You can build a fence by cutting all the pickets the same length, or you can create a curved look by adjusting their lengths and attaching the shortest in the centre and the longest at the ends.</p> <p>To build the fence, temporarily position the posts to check the height, then cut the rail housings. Sink the posts in the ground with concrete and leave to set. Secure the rails in the housings, then attach the pickets. </p> <p><strong>Secure the pickets </strong></p> <p>The key to building a professional-looking fence is to keep the picket’s level and evenly spaced. Use spacers to make sure the gaps are even, aligning the tops of the pickets with a stringline set between the posts.</p> <p><strong>Step 1: Make pilot hole</strong></p> <p>Make a pilot hole jig by drilling two pairs of 3mm holes into a picket aligned to each of the rails. Offset the pairs of holes 15mm from the edges to prevent twisting. Position the jig to drill into three pickets at a time.</p> <p><strong>Step 2: Set pickets</strong></p> <p>Set out the pickets using two 33mm wide spacers made from offcuts with a cross member so they can hang off the rails. Mark out the picket positions with even spacing, starting at the centre of the rails and working towards either side.</p> <p><strong>Step 3: Prepare pickets</strong></p> <p>Prepare the pickets by cutting them to size with a mitresaw, sanding with 150 grit abrasive paper, then priming and painting. Secure each picket using two 45mm x 8g square drive treated pine screws, checking for plumb with a level.</p> <p><em>Republished with permission of </em><a href="http://www.handyman.net.au/build-picket-fence"><em>Handyman Australia</em></a><em>.</em></p>

Lifestyle

Placeholder Content Image

5 subtle ways your house might be making you sick

<p>You probably know lead and asbestos are dangerous substances that can turn up in homes, but you might not know that other chemicals inside our houses, both natural and man-made, can make you sick. These substances can foul your air, water, food, and even the products you use to clean. Some symptoms of sick building syndrome can include irritated eyes, nose, throat, or skin, breathing trouble, fatigue, and confusion; building-related illness may include long-term problems like asthma and allergies. And then there are the chemicals that disrupt hormones or jumpstart cancer. Here are some things you can do that to make your house healthier and reduce your risks.</p> <p><strong>1. You have toxic dust</strong></p> <p>The dust in hard-to-reach corners or settled atop your furniture can do more than cause a sneezing fit, it can actually be toxic. Researchers from George Washington University analysed dust samples data from across the United States and found 45 potentially toxic chemicals hiding within, ten of which turned up in 90 per cent of the samples. One repeat offender was TDCIPP, a flame retardant frequently found in furniture and other household items that is thought to cause cancer; phthalates, often found in toys and vinyl flooring, as well as phenols, typically used in cleaning products, were also found in high amounts. Minimise dust by vacuuming frequently (use the proper attachments to reach into corners and under furniture) and regularly wiping down surfaces.</p> <p><strong>2. You’re addicted to air fresheners</strong></p> <p>If you’re obsessed with keeping your house smelling fresh, you could be affecting your health. Scented candles, oil diffusers, plugin fresheners, and scented sprays may contain phthalates, chemicals that may disrupt the endocrine system by interfering with hormones. “Phthalates can act as a synthetic hormone inside the body. When we have synthetic chemicals that interfere with natural processes, we start worrying about health issues,” says Lara Adler, an environmental toxins expert and certified holistic health coach. Safely freshen your home by using natural essential oils, buying flowers, or simply opening the windows.</p> <p><strong>3. Your kitchen is filled with plastic</strong></p> <p>Plastic storage containers often contain harmful chemicals like BPA, which can leach into your food when reheating or even by filling them when leftovers are still hot. Polycarbonate plastic items (hard and marketed as shatter-resistant) like reusable water bottles, drinking cups, or beverage jugs also often contain BPA, which may interfere with the body’s hormones and potentially raise the risk of developing cancer and diabetes. And don’t let “BPA-free” on the packaging fool you. “Many manufacturers simply replaced BPA with another similar chemical in the same family, which may be just as bad,” says Adler. Avoid plastic whenever possible, says Adler, and opt for glass storage containers or stainless steel water bottles.</p> <p><strong>4. You spray down your shower with bleach</strong></p> <p>Bleach will leave your bathroom tiles sparkling clean, but if mould is an issue, bleach could actually make it worse. “Bleach gets rid of mould in tile grout, but it’s very caustic and grout is permeable, so it actually eats away at grout over time and makes tiny holes for more mould to grow,” says Adler. Try using a solution of hydrogen peroxide and water to combat mould spores, be sure your bathroom has proper ventilation to cut back on the humidity mould thrives in and use a squeegee to wipe down the shower walls to get rid of excess water after bathing.</p> <p><strong>5. You have wall-to-wall carpeting</strong></p> <p>Wall-to-wall carpeting can be a big problem if you don’t take care of it. “It becomes a sink for all kinds of contaminants,” says Adler. Dust and pet dander can settle into the cushioning and cause allergic reactions. And if you don’t remove your shoes before walking through the house, you can track contaminants from the outdoors all over your carpet, like dirt, pesticides, heavy metals, you name it. “Then your kids or pets crawl on the floor and get it all over themselves,” she says. Regularly vacuum and wash carpets and rugs.</p> <p><em>Written by Alyssa Jung and Tina Donvito. This article first appeared in </em><a href="http://www.readersdigest.com.au/home-tips/23-subtle-ways-your-house-might-be-making-you-sick"><em>Reader’s Digest</em></a><em>. </em></p> <p><img style="width: 100px !important; height: 100px !important;" src="https://oversixtydev.blob.core.windows.net/media/7820640/1.png" alt="" data-udi="umb://media/f30947086c8e47b89cb076eb5bb9b3e2" /></p>

Lifestyle

Placeholder Content Image

The best colours to live with

<p>Colours more than just beautify our homes, they can affect how we think, behave and feel, says colour psychologist <a href="http://www.karenhaller.co.uk/">Karen Haller</a>.</p> <p>“Whether or not we like a colour can be shaped by the underlying psychological quality, our cultural beliefs and our personal associations with that colour, making the relationship with colour unique for everyone,” says Haller.</p> <p>When it comes to decorating our homes, colour is personal. Haller recommends using our intuition when choosing colours that instinctively feel right.</p> <p>“First look at the purpose and the positive behaviours you want to create in that room. Then choose the colours that you instinctively feel will create these behaviours,” advises Haller.</p> <p><strong>Get the tone right</strong></p> <p>Different tones of the same colour can elicit completely different positive and adverse behaviours and feelings in people.</p> <p>For example, psychologically a lime green can be stimulating and invigorating for some and make others feel irrational. An olive green can feel warm and safe for some and others may feel stagnant and stuck.</p> <p>“There are thousands of variations of the same colours, each with a different feel, so select the variation of a colour that feels right,” she says.</p> <p><strong>Make sure the proportion of colours is right</strong></p> <p>“The proportion of colour used can have an impact on how we react. For example, an all-red dining room can create a ‘wow factor’ in the short term, but be overstimulating and hard to live with in the long term,” warns Haller.</p> <p>To find the right balance of colour, Haller recommends “not using too much of the one colour but using a combination of colour with accents, or bursts of colour. Be mindful that all white spaces can feel cold, sterile and emotionally numbing.”</p> <p>“Think of your whole colour palette in a room to achieve your desired result,” she adds.</p> <p>Consider introducing these colours into the rooms of your house to tap into their positive psychological effects</p> <p><strong>The bedroom: Try soft greens or an injection of red</strong></p> <p>Avoid yellow here since “yellow affects the nervous system and is the colour linked to our emotions.” Instead, try soft greens to promote a restful night’s sleep. If you’re after a sexier, passion-inducing room, consider smatterings of reds, with silks and rugs and sumptuous fabrics.</p> <p>The hallway, sitting room and breakfast area – Try a warm shade of yellow <br />Yellow here can make people feel welcome and full of energy when they arrive or have their breakfast. “It’s like a big ray of sunshine that greets your guests, the colour of happiness,” says Haller.</p> <p><strong>The bathroom: Try a warm turquoise or warm browns or dark greens</strong></p> <p>Turquoise in the bathroom can help you mentally wake up and feel reenergised in the morning. However, if it’s a relaxing sanctuary you’re after “darker greens and warm browns can create a deeply relaxing environment that you might spend more time in,” says Haller.</p> <p><strong>The living room: Try a shade of green</strong></p> <p>Consider a warm green that isn’t too vivid, for a relaxing space to unwind. “Green in general represents reassurance and balance and can be a great restorative colour,” says Haller. “Avoid lime green which can be too invigorating,” she says.</p> <p><strong>The guest room: Try wood and natural colours</strong></p> <p>Include natural coloured materials such as wood as they are excellent for quest rooms to promote restfulness. “People often resonate with the colour of wood because it makes them feel warm and cosy and rested, like they’re reconnecting back to nature,” says Haller.</p> <p><strong>The office: Try dark blue</strong></p> <p>Accents of dark blue can be excellent for focus and where concentration is needed. “But if your work requires high amounts of energy such as in sales, avoid dark blue which can be too oppressive,” says Haller.</p> <p><strong>Kitchen and dining room: Try a shade of orange or black and white</strong></p> <p>Orange stimulates conversation and the appetite and is perfect for rooms where fun social gatherings occur. “If you’re more a minimalist and like everything neat and packed away, black and white might be more for you,” says Haller. </p> <p>What colour do you like to live with? Share your thoughts in the comments below.</p> <p><em>Written by Dominic Bayley. Republished with permission of </em><a href="https://www.wyza.com.au/articles/lifestyle/wyza-life/the-best-colours-to-live-with.aspx"><em>Wyza</em></a><em>.</em></p>

Lifestyle